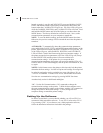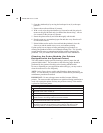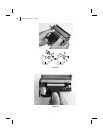
2. Open the printhead (a) by moving the head open lever (b) to the open
position.
3. Remove the media and ribbon (if present).
4. With a swab, wipe the print elements (c) from end to end (the print ele-
ments are the grayish/black strip just behind the chrome strip.) Allow a
few seconds for the solvent to evaporate.
5. Rotate the platen roller (d) and clean thoroughly with alcohol.
6. Brush/vacuum any accumulated paper lint and dust away from the roll-
ers and media sensors.
7. Reload ribbon and/or media, close and latch the printhead, close the
front cover and the media access cover, and continue printing.
If print quality has not improved after performing this procedure, try
cleaning the printhead with Save-a-Printhead cleaning film. This specially
coated material removes contamination buildup without damaging the
printhead. Call your authorized Zebra distributor for more information.
Cleaning the Cutter Module (for Printers
Equipped with the Optional Cutter)
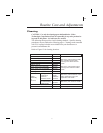
The cutter module requires periodic cleaning to remove paper dust and
gummed label residue. The procedure on the following pages should be
performed by the operator according to the cleaning schedule table.
However, depending on your application and media type, you may need to
clean the cutter more or less frequently.
NOTE: In the figures shown, media and ribbon have been removed for
clarity. It is not necessary to remove media or ribbon before performing the
maintenance procedures described.
IMPORTANT: Do not exchange cutter modules between different
printers. The cutter module adjustments are optimized during installation to
work with a particular printer and may not perform correctly if the module
is placed on a different printer.
I. Removing the cutter module from the printer.
1.
Turn off the printer’s AC power.
2.
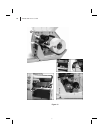
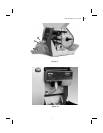
See Figure 17. Remove the label catch tray (a) by lifting it up and away from
the front of the cutter module (b).
3.
Raise the printer’s media access cover and lower the printer’s front cover.
4.
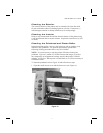
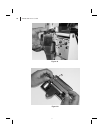
See Figure 18. Gently pull straight down on the cutter cable connector (a) to
remove it from the mating socket on the cutter module.
5.
Turn the cutter mounting screw (b) with a screwdriver or by hand in a
counterclockwise direction until it is loose.
6.
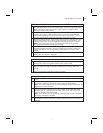
See Figure 19. Hold the cutter module as shown. Apply gentle upward pressure to
the left and right ends while raising the cutter module up and away from the
mounting posts (a). If necessary, rock the module side to side to loosen it.
24 S400 & S600 User’s Guide
32


