


Site Requirements for the Switch 4007
31
■
For rack installations, the selected rack is grounded
in accordance with the rack manufacturer’s
recommendations.
■
To reduce the possibility of personal injury or
serious damage to the chassis, use
at least two
people
to install the chassis. This is especially
important for rack installations, because you must
hold the chassis in place while you secure the
chassis to the rack.
■
Bolt the rack to the floor.
■
Make certain that the rack is properly aligned and
squared. Use a framing tool to ensure that the rack
is squared.
■
Brace the top of the rack against the wall.
■
Provide sufficient space in front of and behind the
chassis so that you can service it easily and provide
proper ventilation.
■
Provide at least 7 cm (2.76 in.) on each side of
the Switch 4007 chassis to ensure proper
cooling in the chassis.
■
Provide at least 91.4 cm (36 in.) in back of the
switch to remove and replace power supplies in
the Switch 4007 chassis.
■
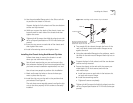
Use the following guidelines to tighten screws to
Torque Specification:
■
Faceplate thumbscrews — 3-5 in/lb
(inch-pounds)
■
#10 screws for holding the chassis onto the
rail — 22-25 in/lb
■
Power supplies to the chassis — 5-7 in/lb
To ensure that you tighten screws to Torque
Specification, use a torque screwdriver.
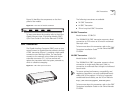
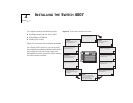
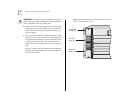
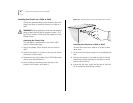
The following list shows the amount of rack space
that is needed to install a Switch 4007 chassis in a
Telco rack or a Metric rack.
■
Height — 30.98 cm / 12.2 in.
The height of the chassis, allowing for some
extension beyond the location of the upper and
lower unit dividing lines.
■
Telco Rack Unit — 7 RU
The unit of measure is 1 Rack Unit (1.75 in. or
4.45 cm).
■
Metric Rack Unit — 12.5 SU
The unit of measure is 1 System Unit
(25 millimeters).
■
Front clearance — 8 cm / 3 in.
This is the recommended minimum space required
between the front of the chassis and another
vertical surface (such as a rack door).
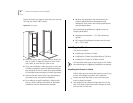
Rack-Mount Installation Recommendations
Use at least two people to install any chassis.
Before you install a chassis into a rack, make certain
that the rack you are using is properly aligned and
squared. Use a framing square to ensure that the rack
is squared. Doing so makes installing the chassis into
the rack easier.