


Installing a 16 MB Expansion Memory Card
61
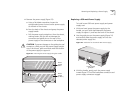
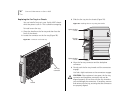
Removing an EME from the Chassis
If you have two EMEs in the chassis, upgrade the
inactive (slave) EME first.
You do not need to power off the Switch 4007
chassis to install, remove, or replace the EME module.
You can replace the module while the chassis is
operating. (This is called a
hot swap
.)
1
Before you remove the EME, read “Safety
Precautions” and “Handling Precautions” earlier in
this guide.
2
If you are upgrading the active (master) EME, unplug
the connection to the console port and the Telnet
port.
3
Use a flat-blade screwdriver to loosen the top and
bottom spring-loaded screws.
4
Open the module ejector handles and gently slide the
EME out of the chassis.
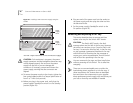
Installing Expansion Memory
Follow these steps to remove the existing memory
card from the EME and to install the new 16 MB
expansion memory card:
1
Locate the expansion memory card on the EME
module printed circuit board.
CAUTION:
To avoid damage due to static discharge,
handle the EME module by the front panel or edges
only.
2
Remove the 4 MB expansion memory card from the
memory card slot.
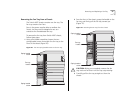
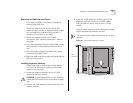
3
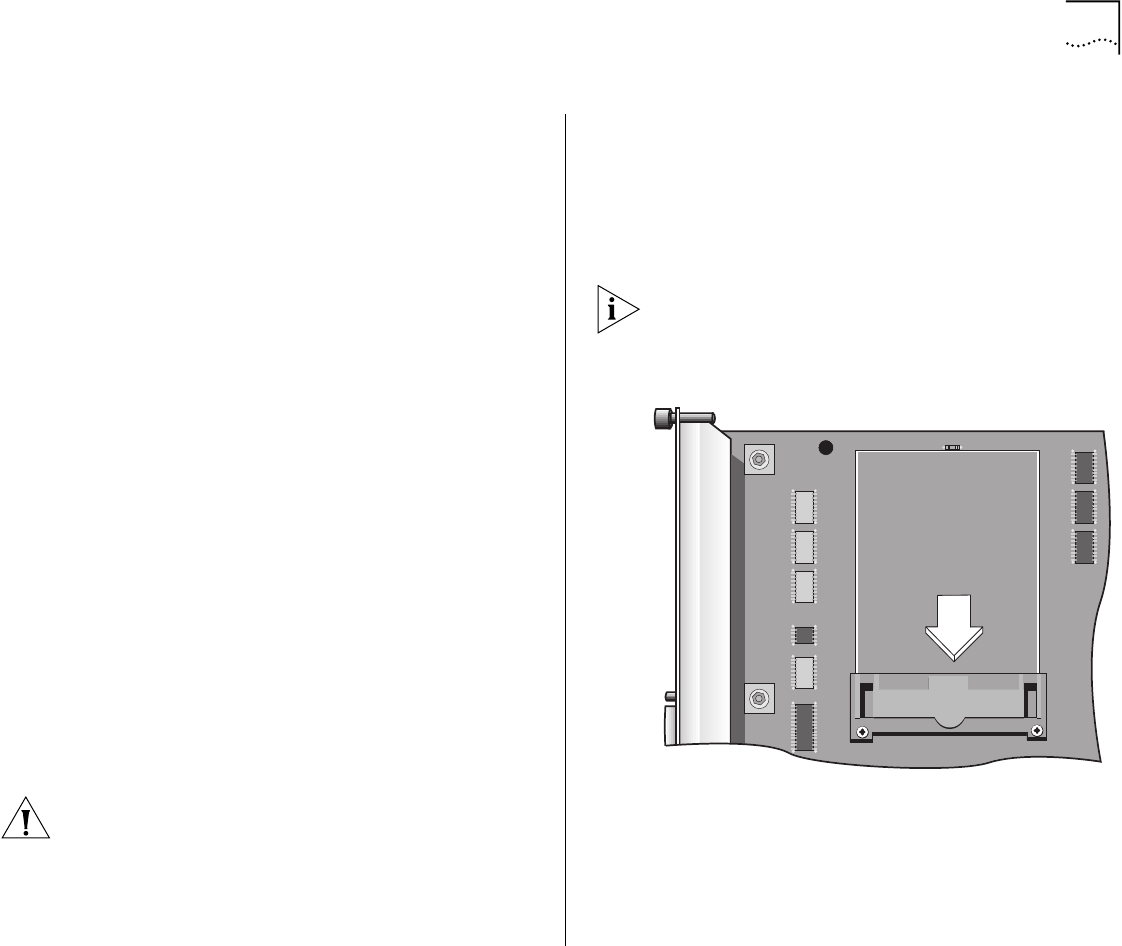
Insert the 16 MB expansion memory card into the
expansion memory card slot on the EME module.
Press the memory card in place so that it is firmly
seated.
Figure 2 shows where to insert the expansion memory
card in the expansion memory card slot.
The memory card is keyed to ensure that you insert it
correctly.
Figure 30
The Expansion Memory Card Slot
EME
Front Panel