


Removing and Replacing a Power Supply
55
4
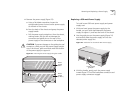
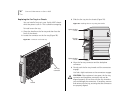
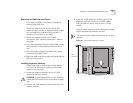
Remove the power supply (Figure 23).
a
Using a flat-blade screwdriver, loosen the
spring-loaded screws that secure the power supply
to the back of the chassis.
b
Face the back of the chassis and grasp the power
supply handle.
c
Pull the power supply straight out from the chassis,
making certain that you do not damage the
connectors and guide pins on the rear of the
power supply or the connectors on the backplane.
CAUTION:
To prevent damage to the guide pins and
connectors, while you pull the power supply straight
out of the chassis, place one hand under the bottom
of the power supply to support it.
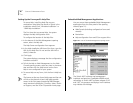
Figure 23
Removing the Power Supply Using the Handle
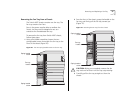
Replacing a 930-watt Power Supply
To install a new 930-watt power supply and power
supply cord:
1
With one hand, grasp the power supply by the
handle; put your other hand beneath the power
supply to support it; and face the back of the chassis.
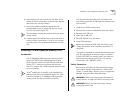
2
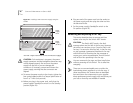
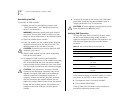
Use the guide pins on the power supply (Figure 24)
and carefully slide the power supply unit into the
selected power supply slot.
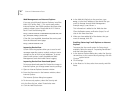
Figure 24
Guide Pins for the Switch 4007 Power Supply
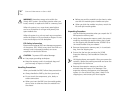
3
With the handle, gently push the power supply
inward (Figure 27) until the backplane connectors and
power supply connectors engage.
Power
supply
slot 2
Power
supply
(in slot 1)
Power supply
guide pin