


14 CHAPTER 2: INSTALLING THE WIRELESS CLIENT
4 Read the CardWizard Software License Agreement and click Yes.
5 When prompted to remove the PC Card, eject the card and click Yes.
6 In the Select Type of Platform window, select your computer type and click Next.
If your computer type is not listed, select Other Notebook and click Next.
7 Respond to the prompts to install CardWizard.
8 When the CardWizard installation finishes, click the radio button to restart the
computer and click Finish.
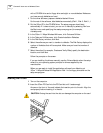
9 Insert the PC Card.
Set Up the PC Card After the computer restarts, the 3Com 11 Mbps Wireless LAN Client Setup
window opens, in which you specify the PC Card configuration.
1 In the 3Com 11 Mbps Wireless LAN Client Setup window, select Typical and
click Next.
Typical configures the PC Card with the following default values:
WLAN Service Area—Attach to any WLAN Service Area automatically
Security Setting—No security (Open system)
If you want to customize the PC Card configuration, for example, to add security,
select Custom. See “Custom Installation Options” on page 16 for details on
custom settings. For the fastest installation, it is recommended that you use the
typical settings. You can customize the configuration later as described in “Setting
the Wireless Client Configuration” on page 23.
2 In the Summary window, review the PC Card setup and click Finish.
3 When prompted to run the Setup program, click OK.
4 Run the Setup program:
a From the Windows Start menu, select Run.
b In the Run dialog box, enter a path to the Setup program on the 3Com CD. For
example, d:\srsetup.exe.
The 3Com 11 Mbps Wireless LAN Setup program starts.
Install Utilities
1 Read the Welcome page and click Next.
2 Read the Software License Agreement and click Yes. (If you click No, the
installation stops.)
3 Select a destination folder for the software files and click Next.
4 In the Setup Type window, select the type of installation for the software:
Typical—Installs the software and documentation.
Compact—Installs the software but not documentation.
Custom—Allows you to choose the components to install.
5 Follow the directions in the Select Program Folder window and click Next.
6 In the Desktop Icon Option window, click Yes.