


Chapter 3 67
Removing the Keyboard/ LCD Module and VGA Board
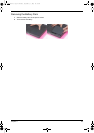
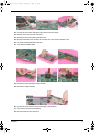
Removing the Keyboard
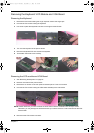
1. Remove the two screws holding the hinge caps then remove the hinge caps.
2. Unscrew the four screws holding the keyboard.
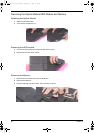
3. Use a tool to press the keyboard lock latch on the right and the left side.
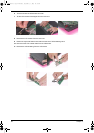
4. Turn over the keyboard as the picture shows.
5. Disconnect keyboard FFC then remove the keyboard.
6. Then detach the middle cover carefully.
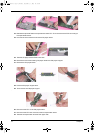
Removing the LCD module and VGA Board
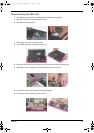
1. See “Removing the Keyboard” on page 67.
2. Remove one screw as the picture shows.
3. Remove the six screws on the rear panel and buttom panel. Three on each side.
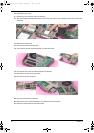
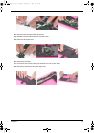
4. Unscrew the four screws holding the VGA board assembly to the main board.
NOTE: Please make sure you have removed the screw that is near the ventilation hole as step 2 shows.
Otherwise, you may damage the VGA board while you need to remove it. That screw secures the VGA
board as well.
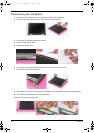
5. Disconnect the LCD inverter connector.
TM420.book Page 67 Monday, September 23, 2002 10:27 AM