


AcerRouter 700 Series User Guide 3-1
3
Chapter 3 Configuring the AcerRouter 700
Once you have completed the installation stage and have configured PC as described
in chapter two, you are ready to configure the AcerRouter 700 for actual applications.
This chapter describes how to configure your AcerRouter for basic Internet access, as
well as for the following configurations:
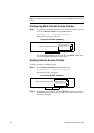
• To set up Internet access with advanced features
• To configure remote office access profiles
• To configure dial-in user profiles
• Set the system time
• Configure Internet access time restrictions
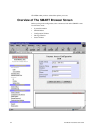
Internet Access in Five Minutes
In the following sections you will be shown how to configure the AcerRouter 700 for
basic Internet access in less than five minutes using the web browser based Simple M
ultifunction Access configuRation Tool (SMART).
Using Different Browsers for AcerRouter Configu
ration
To configure your AcerRouter 700, you can use popular browsers such as Netscape
4.x and Internet Explorer 4.x and 5.x. The following describes, after each browser is
brought up, how to use it to start the SMART interface:
Netscape Navigator 4.x:
In the Location box (where you normally enter the URL address), enter the default
private IP address of the AcerRouter 700 followed by hitting the return key:
http://192.168.168.230
Internet Explorer 4.x and 5.x:
In the Address box (where you normally enter the URL address), enter the default
private IP address of the AcerRouter 700 followed by hitting the return key:
http://192.168.168.230
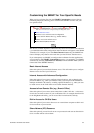
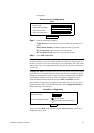
Logging On
After entering the default IP address as described above, a password prompt screen