


3-14 AcerRouter 700 Series User Guide
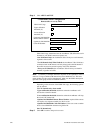
Configuring for Remote Office Access
In order for the local LAN to access a remote LAN, you need to configure a conne
ction profile for the router on each site (the remote router and the local router).
Note that the remote site does not have to have a Acer Netxus router, and may not be
configurable by the local administrator. In either case, make sure the configuration of
the AcerRouter 700 matches the requirements of the remote site.
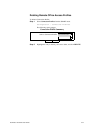
ISDN Configuration
To configuring the ISDN interface for Remote Office connectivity, follow these ste
ps:
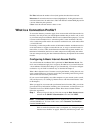
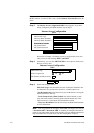
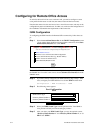
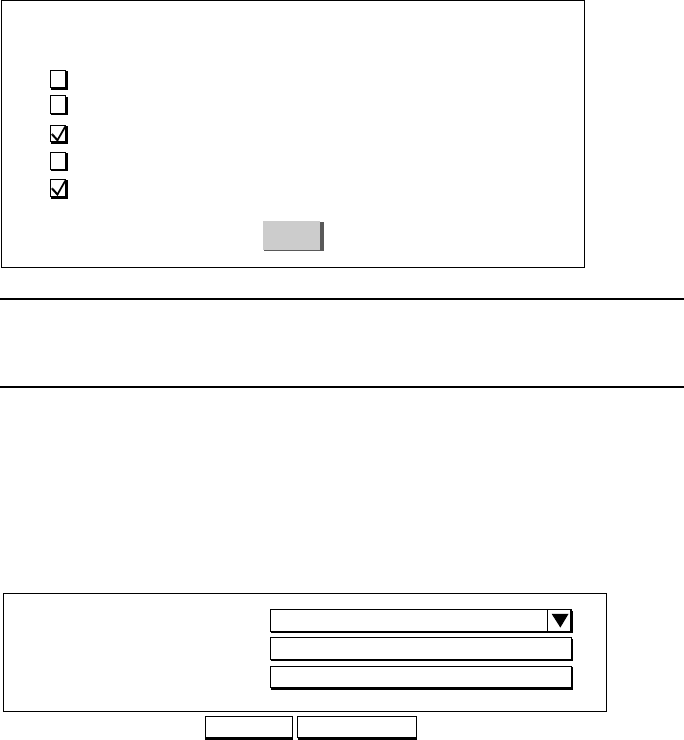
Step 1 Select Access to/from Remote Site in the SMART Configuration screen
. If you want to share NetWare resources on this connection, select Share
NetWare(IPX) Resource also. Click NEXT.
Note: The SMART Customization screen displays the very first time you invoke
the SMART tool. To return to this screen, select Customize User Interface from the
SMART menu.
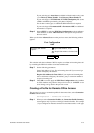
Step 2 If you have already configured your ISDN interface, skip to Step 7. Othe
rwise, configure your ISDN interface now. Select ISDN from the menu
Configuration - WAN Interfaces - ISDN
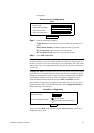
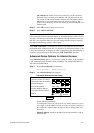
Step 3 The following screen appears.
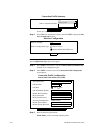
Step 4 Select your ISDN Switch Type from the pull-down list. Your ISDN se
rvice provider will tell you what switch type you have.
Step 5 After you select your ISDN Switch Type, you may be required to enter
“ Directory Phone Number 1” and “Directory Phone Number 2”, or “S
PID1” and “SPID2.”
S
imple
M
ultifunction
A
ccess configu
R
ation
T
ool
Basic Internet Access
Internet Access with Advanced IP Configuration
Access to/from Remote Site (e.g., Branch Office)
Dial-in Access for Off-Site Users
Share NetWare(IPX) Resource
Select one or more items to be configured during this management session
Next
ADVANCED
ISDN Switch Type
Directory Phone Number 1
Directory Phone Number 2
Port Configuration
APPLY
ISDN
Auto-detect (North America only)