


3-22 AcerRouter 700 Series User Guide
Setting Up Dial-in User Accounts
If you selected Dial-in Access for Off-Site Users from the SMART Customization
screen, follow the steps in this section to set up the AcerRouter 700 to allow dial-in
access from remote users.
ISDN Configuration
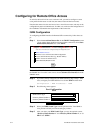
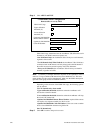
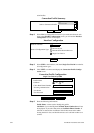
Step 1 Select Dial-in Access for Off-Site Users in the SMART Customization
screen. If you want to share NetWare resources on this connection, select
Share NetWare(IPX) Resource also.Click NEXT.
Note: The SMART Customization screen displays the very first time you run the S
MART software. To display this screen again, select Customize User Interface from
the menu.
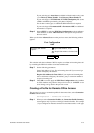
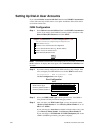
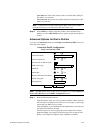
Step 2 If you have already configured your ISDN interface, skip to Step 6. Othe
rwise, configure your ISDN interface now. Select ISDN from the menu:
Configuration - WAN Interfaces - ISDN
The Port Configuration screen displays.
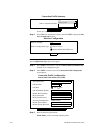
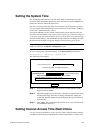
Step 3 Select your ISDN Switch Type from the pull-down list. Your ISDN se
rvice provider will tell you what switch type you have.
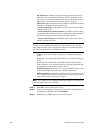
Step 4 After you select your ISDN Switch Type, you may be required to enter
“ Directory Phone Number 1” and “Directory Phone Number 2”, or “S
PID1” and “SPID2.”
If your switch type is Auto-detect (available in North America only), ente
r your Directory Phone Number 1 and Directory Phone Number 2.
If your switch type is NT DMS-100, ATT 5ESS (Multipoint), N1-1, ente
r SPID1 and SPID2 (provided by your phone company).
S
imple
M
ultifunction
A
ccess configu
R
ation
T
ool
Basic Internet Access
Internet Access with Advanced Configuration
Access to/from Remote Site (e.g., Branch Office)
Dial-in Access for Off-Site Users
Share NetWare(IPX) Resource
Select one or more items to be configured during this management session
Next
ISDN Switch Type
Directory Phone Number 1
Directory Phone Number 2
Port Configuration
APPLY
ISDN
Auto-detect (North America only)
ADVANCED