


AcerRouter 700 Series User Guide 6-1
6
Chapter 6 Advanced Configuration
This section covers advanced configuration of the AcerRouter 700 . These functions
include:
• Creating Virtual Private Networking Connections
• Using Packet Filtering
• Configuring IP Settings
• Configuring IPX Settings
• Configuring Bridging Settings
• Using the Command Line Interface
Creating Virtual Private Networking Connections
Before continuing on with this section, be sure you’ve reviewed the section, “To
Create a Virtual Private Network (VPN)” in Chapter 1.
When you set up your VPN, keep in mind that the VPN connection (the “tunnel”)
emulates an actual hardware wide area network port. After setting up your VPN
tunnel, you can create a connection profile to allow access to and from a remote site.
VPN connections are created automatically as a result of a reference by a LAN user to
a resource reachable through a VPN connection.
Configuring VPN Remote Office Access Profiles
In order to set up access to and from a remote site, be sure to configure both ends of
the VPN tunnel appropriately (the remote router and the local router). If you selected
Access to/from Remote Site from the SMART Configuration screen, follow the
steps in this section.
Note: When communicating with a remote office, the private IP addresses must be
different on both sides of the connection. To do this, follow the steps indicated in the
section, “To Configure Advanced IP Settings”.
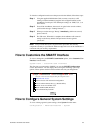
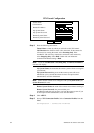
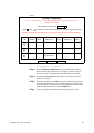
Step 1 Select Access to/from Remote Site in the SMART Configuration
screen. If you want to share NetWare resources on this connection, select
Share NetWare(IPX) Resource also.
Note: The SMART Configuration screen is displayed the very first time you run
the SMART software. To return to this screen, select Customize User Interface from
the menu.
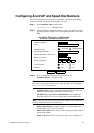
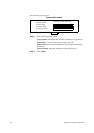
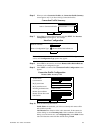
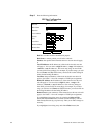
Step 2 Configure a VPN tunnel. Select VPN Tunnel from the menu:
Configuration - WAN Interface - VPN Tunnel