


:ANAPURNA XL² OPERATOR MANUAL
AB]]]]]]]]]]]]]]]]]]]]]]]]]]]]]]]]]]]]]]]]]]]]]]]]]]]]]]]]]]]]]]]]]]]]]]]]]]]]]]]]]]]]]]]]]]]]]]]]]]]]]]]]]]]]]]]]]]]]]]]]]]]]]]]]]]]]]]]]]]]]]]]]]]]]]]]]]]]]]]]]]]]]]]]]]]]]]]]]]]]]]]]]]]]]]]]]]]]]]]]]]]]]]]]]]]]]]]]]]]]]]]]]]]]]
35
]
8/08/2008
]
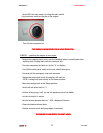
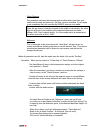
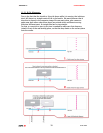
Check Distance:
This parameter indicates the measure position offset where you have your
media onto the belt and where the “Set Gap” must be executed. If your media
is not completely flat, this must be the HIGHEST point on your media.
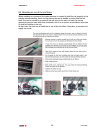
Remark:
Since the gap sensor is however located in the middle of the shuttle, the value
that has to be put in the textbox is the measured offset onto the table +
400mm (400 = half a shuttle width). So if the media has to be measured at
1m offset, you have to fill in ‘1400’ .
Reference:
This is the height at the point where the “Head Base” will wait for an on-
screen confirmation, before going down to set the desired “Gap”. This value is
a mechanical parameter that is unique for each engine, and may not be
changed by the user.
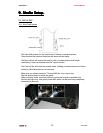
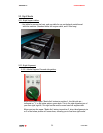
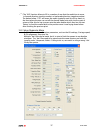
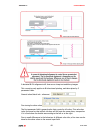
When all parameters are Ok, load the media onto the table, click on the “Set Gap”
Procedure : When you’ve entered a “1.5mm Gap” & “Check Distance: 1200mm”
- The Head Base will stay in the Home position and go up to the highest
limit position (> 50mm).
- After this movement, you have to confirm on-screen that the carriage is
clear to move, to the “Check Distance” position.
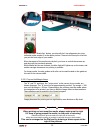
- Shuttle will move to the left until the measure spoon is around 800mm
from the start of the vacuum table and will come down to set the Gap.
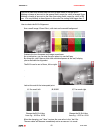
- A sensor plate (called spoon) will become visible underneath the Head
Base, to make
contact with the media surface.
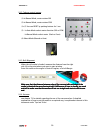
- The Head Base will lower to his “Reference” point, and you’ll have
to confirm on-screen (Ready to Set Gap) to make the last fine-tuning. This
is lowering from the Reference point, to the desired Head Base Height (1.5
mm Gap)
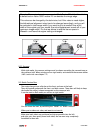
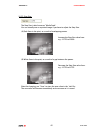
- When this is done, you’ll get following message: “Check Gap and
Ready to Go to Home Position”. At this point, you can verify
the correct Gap setting with a measuring device.
Click on OK, and the Set Gap is completed.