


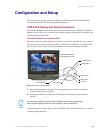

Configuration and Setup
23
VTM-D15/A 15" MultiMedia Touch Panel Systems
Configuration and Setup
This section covers the steps needed to configure the VTM-D15/A and VTM-D15/AB panels’
communication features and TPI/3 programming commands.
VTM-D15/A Startup and Setup Procedures
Now that the MultiMedia Touch Panel is powered and connected to the AXB-TPI/3 Touch Panel
Interface, all that’s left to do is to get the display settings adjusted and prepare it for displaying the
incoming signals from the TPI/3.
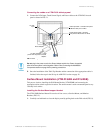
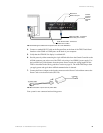
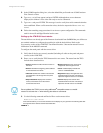
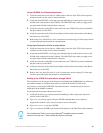
Front Panel buttons and indicators LEDs
On the lower-right side of the touch panel is located a set of buttons that allow the user to activate
the panel and access panel display menus (FIG. 21). Refer to the VTM-D15/A and VTM-D15/AB
Specifications section on page 3 for more information on the front panel buttons and LED.
1. Press the Power button on the panel. If no image appears on your monitor, refer to the
Troubleshooting section on page 45.
2. Adjust the resolution by pressing the AUTO button (to automatically adjust the picture
quality).
The following sections require that you first use the TPI/3 with a Terminal Emulator (i.e., AxcessX
or Windows HyperTerminal).
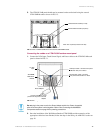
FIG. 21 Front panel buttons and LEDs
Decrease button
Down button
Up button
LED indicator
Increase button
Power button
AUTO button
VTM-D15/A MultiMedia
Touch Panel (front view)
For best picture quality when using the panel to display an incoming computer signal,
adjust the video signal resolution from the computer to 1024 x 768 at 60 Hz.