30
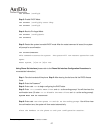
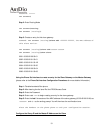
and "#" as the ending prompt. You will then hear the confirmation tone.
Step 8: Enter code "05" to begin the group ID configuration.
Step 9: Enter the group ID as "2009" and "#" as the ending prompt. You will then hear the
confirmation tone.
System must now be restarted
Step 10: Enter code "98" then press "1" and "#" as the ending prompt. You will then hear
the confirmation tone and the system will restart automatically.
Step 11: Enter code "09" to begin configuring the prefix for this gateway.
Step 12: Enter the prefix as "99" and "#" as the ending prompt. You will then hear the confirmation
tone.
Step 13: Enter code "14" to begin configuring the Internal Call Access code for this gateway.
Step 14: Enter the Internal Call Access Code as "*" and "#" as the ending prompt. You will then
hear the confirmation tone.
Step 15: Enter code "28" to begin configuring the Extension Number Length of the PBX for this
gateway.
Step 16: Enter the Extension Number Length of the PBX as "3" and "#" as the ending prompt. You
will then hear the confirmation tone.
System must now be restarted
Step 17: Enter code "98" then press "1" and "#" as the ending prompt. You will then hear
the confirmation tone and the system will restart automatically.
Replace the handset on the phone to end your configuration session.
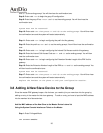
3.8 Adding A New Slave Device to the Group
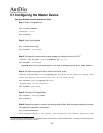
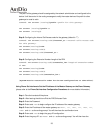
Since the master PBX gateway keeps a list of slaves, you need to join your new slave into the group by
adding an entry in the master for this slave gateway . To add an entry you have to input the MAC address
into the member list of slave devices.
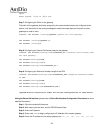
Add the MAC address of the New Slave to the Master Device's slave list
Using the System Console Interface or Telnet on the Master
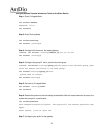
Step 1: Enter Privileged Mode
PBX GATEWAY>enable


