


NetWare
UNIX
Windows
OS/2
Macintosh
AXIS 540/640 User’s Manual Section 3: Basic Installation
23
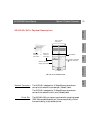
Connecting a printer to the Token Ring Network
Follow the instructions below to connect a printer to the network via
the AXIS 640/642 print server.
Caution! ❏ The AXIS 640/642 external power supply you are using must be
marked with the correct voltage! Refer to Section 2 Package
Contents, on page 13.
❏ DO NOT connect or disconnect the network cabling while AXIS
640/642 is powered on.
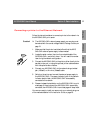
1. Make sure that the printer is switched off and that the AXIS
640/642 external power supply is disconnected.
2. Locate the serial number, found on the underside label of the
AXIS 640/642, and write it down. You will need this number
later during the network configuration.
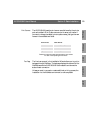
3. Connect the AXIS 640/642 to the printer, either directly to the
parallel printer port, or using the optional printer cable extension
with the optional velcro ribbons.
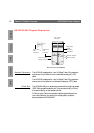
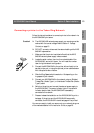
4. Slide the Ring Speed switch towards 4 or 16 depending on the
ring speed of your network.
5. Connect your AXIS 640/642 to the network using an Shielded
Twisted Pair (Media Type 1) or Unshielded Twisted Pair (Media
Type 3) cable.
6. Switch on the printer and connect the external power supply to
the AXIS 640/642. The power indicator lights. If the network
indicator starts to flash, the AXIS 640/642 is successfully
connected to the network.
7. Press and release the test button on the AXIS 640/642 to print a
test page. If the printer and the AXIS 640/642 are correctly
connected, the AXIS 640/642 internal test page will be printed.
You are now ready to install your server onto your network using one
of the methods detailed in the Installation Guide, on page 25.