


NetWare
UNIX
Windows
OS/2
Macintosh
Section 3: Basic Installation AXIS 540/640 User’s Manual
34
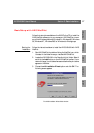
Using
AXIS IP Installer
Follow the instructions below to set the IP address of your AXIS
540/640 using the AXIS IP Installer:
Important! ❏ You should not use AXIS IP Installer to set the IP address of the
AXIS 540/640, if you have an active DHCP server in your
network.
1. Download the AXIS IP Installer to your host. The software is
available on the AXIS Online CD and on the Axis home page at
http://www.axis.com/.
2. Connect the AXIS 540/640 to the network. Note the serial
number that is located on the underside label of the AXIS
540/640. You will need it in the proceedings steps.
3. Start the AXIS IP Installer.
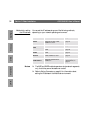
4. Click the serial number of your AXIS 540/640 that appears in the
server list.
5. Enter the desired IP address in the designated IP address field and
click the Set IP address button.
6. The IP setting process will take approximately 10 to 40 seconds.
Click OK in the confirmation box that appears when the IP
address has been set.
Notes: ❏ AXIS IP Installer uses the BOOTP and DHCP protocols to
communicate with the AXIS 540/640. Make sure that at least one
of these protocols is enabled in your print server.
❏ Restart your AXIS 540/640, if it does not show up in the server
list.