


36
Using your Rack-Mount Console KVM Switch
Connecting the server to the Rack-Mount Console KVM Switch:
1. Power on the Rack-Mount Console KVM Switch.
2. Connect one end of the USB cable to the flash port on your Rack-Mount
Console KVM Switch (the USB “B” connector) and the other end to
the server’s USB port(s). You may need one or more USB hubs between
the server and the Rack-Mount Console KVM Switch if you intend to
update multiple Rack-Mount Console KVM Switches (or other KVM
devices) simultaneously.
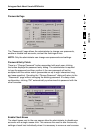
NOTE: Before you begin the update, the administrator should go into the
“Options” page in the OSD, press the “Display Version Numbers” button, and
record the current version numbers; this will allow the administrator to confirm
that the firmware was updated correctly.
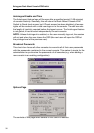
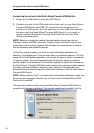
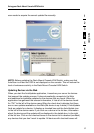
To start the update process, you must run the AutoUpdate application by
selecting “AutoUpdate.exe” from the start menu, or a desktop shortcut. The first
screen of the AutoUpdate application will prompt the user to select an automatic
or manual update. You should generally select automatic, unless you have a
specific reason to do otherwise. An automatic update will check the firmware on
the Rack-Mount Console KVM Switch and compare the versions installed against
the latest versions available; if there are newer versions, the application will
download the new firmware from the Internet and transfer it into the Rack-Mount
Console KVM Switch.
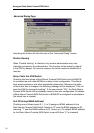
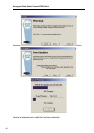
NOTE: Before clicking “Next” to continue the AutoUpdate installation, make sure
all servers are unplugged. Failure to do so could render the Rack-Mount KVM
Switch non-functional.
The user then needs to power-cycle the Rack-Mount Console KVM Switch to
complete the firmware installation. The manual update works similarly, but the