


2-18 BE-0901E-AC-PC• BE-1201B-AC-PC
Chapter 2 Preparation of Embroidery Machine
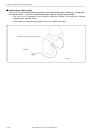
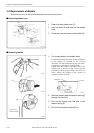
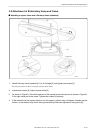
If the machine is not ready to operate because the needle bars in the drive position are out of the
normal position, "E-05" appears. Follow the steps below if this occurs.
W1588
!
!!
! Normal needle stop position
W1589
W1590
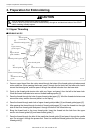
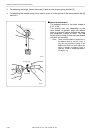
1. Set "100° (→)" on the pulley to "STOP
POSITION."
2. Press
.
Note) Check if the needle bars are lowered.
If so, return them to the normal stop
position. (Refer to "Normal needle
stop position" on page 2-18.)
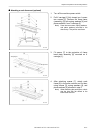
3. A buzzer sounds, the X and Y carriages
move automatically so as to bring the hoop
center to the home position or to the
position where it was located at the end o
f
the previous operation.
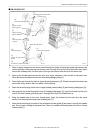
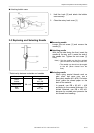
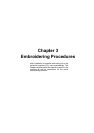
Viewing the inside through the clearance,
each needle bar is in the jump position at the
top (as shown in the figure) and needle ba
r
vertical piece [5] lowers to keep it from
contact with needle bar clamp [6]. (The
thread take-ups are aligned horizontally.)
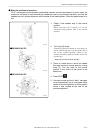
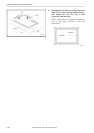
Note) When the power switch has been
turned on or when restarting
embroidering while the machine is
stopped or suspended, be sure to
return the needles to the normal stop
position.
• Align all thread take-ups horizontally.
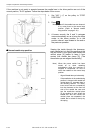
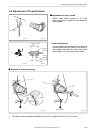
• If the needle bar in the embroidering
position is lowered with needle ba
r
vertical piece [5], separate them in
the following manner. For safety,
insert a tool such as a screwdriver
into the clearance at the front left
side of the needle bar case and
turn the needle bar vertical piece
[5] by pushing its end. When the
needle bar and the needle bar
vertical piece are separated, the
needle bar is raised to the top by
the spring.
[6]
[5]
[6]
[5]