BE-0901E-AC-PC• BE-1201B-AC-PC 2-21
Chapter 2 Preparation of Embroidery Machine
!
!!
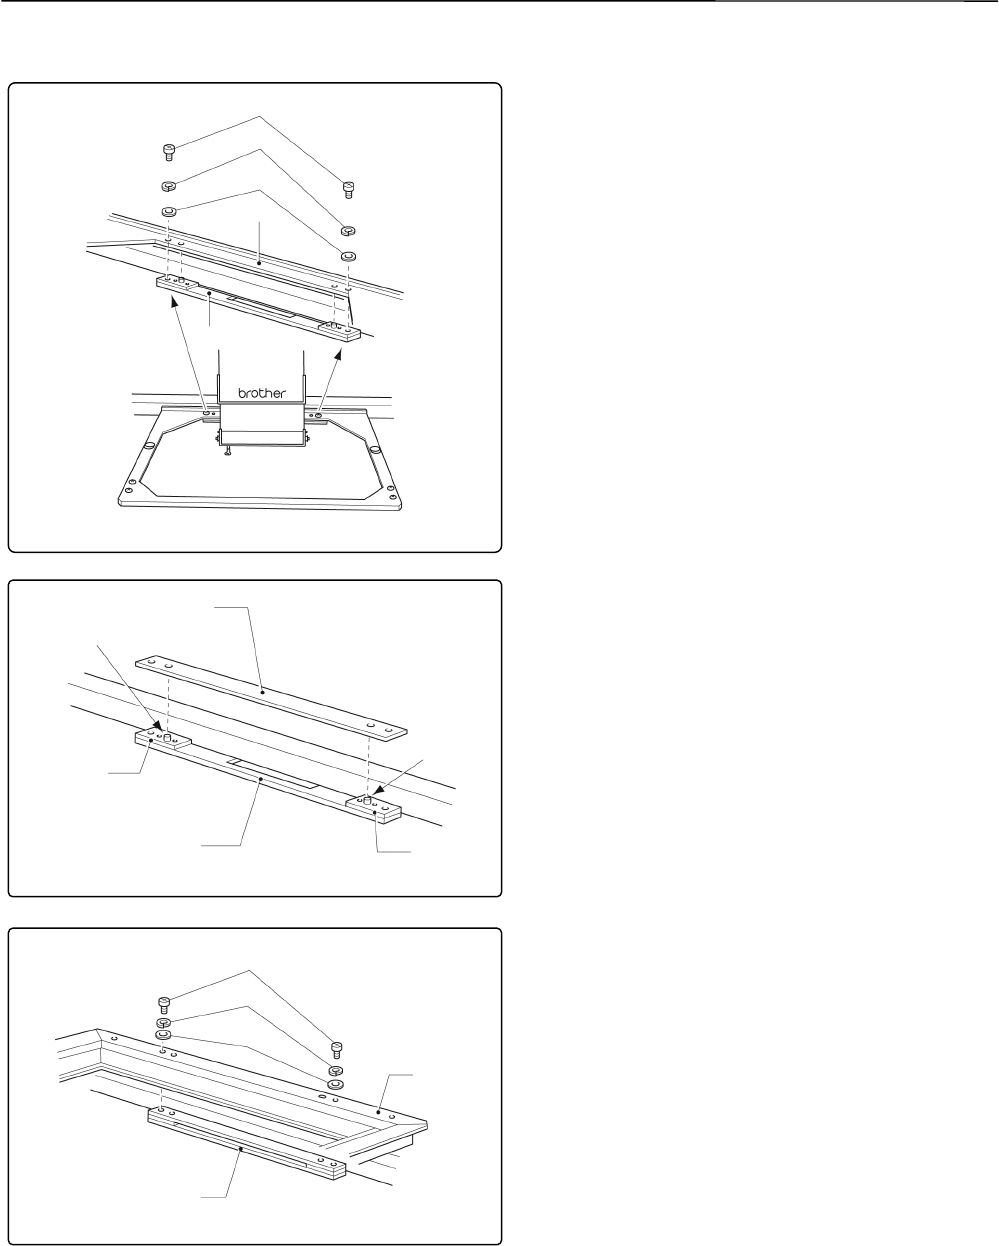
! Attaching a sash frame set (optional)
W1593
W1594
W1595
[6]
[1]
[6]
[2]
Projection
Projection
[3]
[1]
[4]
[5]
[7]
1. Turn off the machine power switch.
2. Pull X carriage [1] fully toward you. Loosen
two screws [3]. Remove flat hoop frame
(assembly) [2] with spring washers [4] and
plane washers t from X carriage [1]
Note) Save the two screws, spring washers,
and plane washers removed in the
above step. They will be used later.
3. Fit spacer [7] to the projection of frame
base plate assembly [6] mounted on X
carriage [1] .
4. After attaching spacer [7], attach sash
frame [8] in the same manner and fix them
using screws [3], spring washers [4], and
plane washers [5] removed in step 2
Note) When attaching the sash frame, check
that the side with felt affixed to the
back faces the front.
[8]
[3]
[4]
[5]
[7]


