


14 - 20 TROUBLESHOOTING AND ROUTINE MAINTENANCE
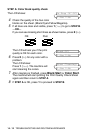
6
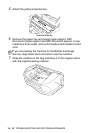
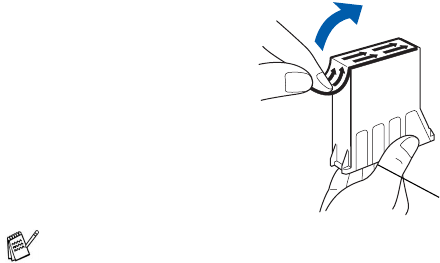
Hold the new ink cartridge as shown in the illustration, and then
peel the sealing tape from the side of the ink cartridge.
Carefully peel the tape in the direction away from you.
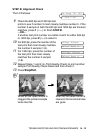
7
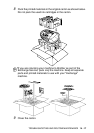
Each color has its own correct position. Insert each new ink
cartridge into the carriage.
8
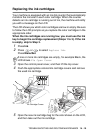
After installing the ink cartridges, close the top cover and control
panel cover. Your machine prepares for a “head cleaning” and
goes online.
The LCD prompts you to verify that you removed the ink
cartridge for each color. Example:
Have you removed Blck?
1.Yes 2.No.
9
If you removed the ink cartridge, press
1
—OR—
If you did not remove the ink cartridge, press
2
.
The LCD prompts you to verify that the ink cartridge was a
new
one. Example:
Changed to new Blck? 1.Yes 2.No.
10
If the ink cartridge you installed is not a brand new one, please
be sure to press
2
.
—OR—
For each
new
cartridge, press
1
on the dial pad to automatically
reset the ink dot counter for that color. (The ink dot counter
enables the machine to notify you when a color is running low.)
The machine will enter a cleaning cycle for approximately 3
minutes for each replaced cartridge. The LCD alternately shows
Cleaning
and
Please Wait
.
When the machine completes the cleaning cycle, the LCD
returns to Standby mode condition.
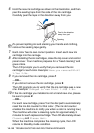
To prevent spilling ink and staining your hands and clothing,
remove the sealing tape gently.
Peel in the direction
away from you!
Opening