


33
LPR Printing in Microsoft
®
Windows NT
®
4.0, Microsoft
®
Windows
®
2000 Pro and Microsoft
®
Windows
®
XP
This section explains how to setup and print with the PS-9000 using LPR in Microsoft
®
Windows NT®
4.0, Microsoft
®
Windows
®
2000 Pro and Microsoft
®
Windows
®
XP.
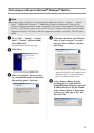
Print using an LPR port in Microsoft
®
Windows NT
®
4.0
(PT-9500PC only)
1
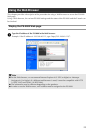
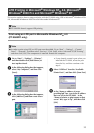
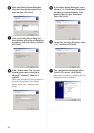
Go to “Start” – “Settings” – “Printers”,
and then double-click [Add Printer] to
start up the wizard.
2
In the following dialog box that appears,
select “My Computer”, and then click
[Next].
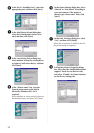
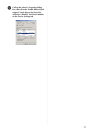
3
In the following dialog box that appears,
click [Add Port], and then create a new
port.
• If you already created a port when you
installed the PS-9000, select the port
from the list, and then continue with
step 6.
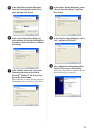
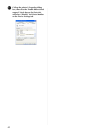
4
Select “LPR Port” from the “Available
Printer Ports”, and then click [New Port].
5
In the “Name or address of server
providing lpd” box, type in the IP address
that was set for the PS-9000. In the
“Name of printer or print queue on that
server” box, type in “lp”, and then click
[OK].
Note
● PT-9200DX doesn't support LPR printing.
Note
● In order to print using LPR, an LPR port must be added. Go to “Start” – “Settings” – “Control
Panel”
– “Network”, and then select “Services”. Click [Add], select “Microsoft TCP/IP Printing”,
and then click [OK]. The component is installed. Restart the computer.