


6-2
Using the Fax Functions
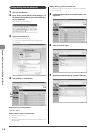
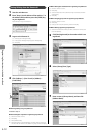
Specify destination.
2010 01/01 12:52AM
RX Mode: Auto
Resolution: 200 x 10
0
...
1
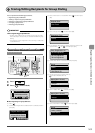
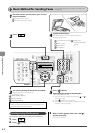
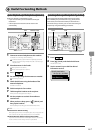
Place documents on the platen glass or load
them in the feeder.
"Placing Documents" (
→
P.2-4)
"Documents Requirements" (
→
P.2-2)
2
Press [ ].
3
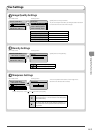
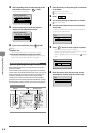
Set scanning settings for documents as needed.
There are the three items you can specify.
(For details, see P.6-3 .)
Image quality settings
Density settings
Sharpness settings
The settings speci ed here are e ective only for the current sending
operation. To make the settings e ective for all the copy operations, see
"Changing the Default Values for Fax" (
→
P.6-20) .
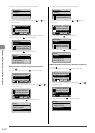
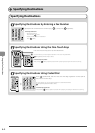
4
Specify the destination.
These are the following methods to specify a destination.
(For details, see P.6-4 to 6-5 .)
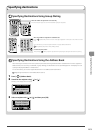
5
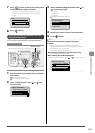
Press [ ] (B & W).
When placing documents on the platen glass
Perform the following procedure.
(1) Select the size of the original document with [ ] or [ ],
and then press [OK].
(2) Press [ ] (B & W) for each document.
(3) When all documents are scanned completely, select <Start
Sending>, and then press [OK].
Entering the fax number
One-touch keys
Coded dialing
Group dialing
Address book
- Sequential broadcast
(
→
P.6-9)
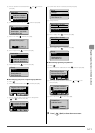
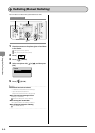
Canceling Sending of Fax D ocuments
You can cancel a sending job that is in the process of being sent.
1
Press [ ].
2
Press [ ] (Stop).
Basic Method for Sending Faxes
3
When <Cancel?> appears, select <Yes> with [ ],
and then press [OK].
Transmission is canceled.
This section describes the basic procedure for
sending faxes.