


7-4
Using the Scan Functions
5
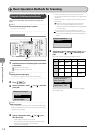
Specify the scan settings depending on the types
of documents or use.
The following settings can be changed.
For details on each item, see "Scan" in the e-Manual.
Scanning size
Density
Original orientation
Original type
Sharpness
Data Size (Color Only)
The settings speci ed here are e ective only for the current
operation.
To make the settings e ective for all the transmitting operations to
a USB memory, see "Scan" in the e-Manual.
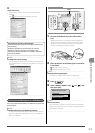
6
Press [ ] (Color) or [ ] (B&W).
For Color Scan
Press [
] (Color).
For Black and White Scan
Press [
] (B&W).
Scanning operation starts. The scanned data is sent to the USB
memory when scanning is complete.
Names of the folders and les where data is saved
Folder name The "SCAN_00" folder is created in the uppermost hierarchy
(root directory) in the USB memory, and the le is saved in
this folder.
When the "SCAN_00" folder is full, the "SCAN_01" folder is
created, and folders (up to "SCAN_99") will be created in
order.
File name A le name between "SCAN0000.PDF" and "SCAN9999.PDF"
is provided.
The two-digit number of the folder is provided in the fth
and sixth characters from the left.
Up to 100 les can be saved in a folder.
•
•
•
•
•
•
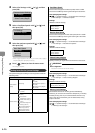
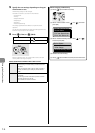
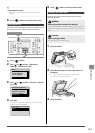
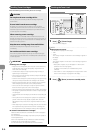
When removing a USB memory
(1) Press [
] (Status Monitor/Cancel).
(2) Select <Device Status> with [ ] or [ ], and then
press [OK].
Status Monitor/Cancel
Device Status
Copy Job Status
Fax Job Status/Hist...
Print Job Status/Hi...
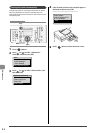
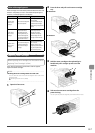
(3) Select <Remove Memory Media> with [ ] or [ ],
and then press [OK].
Device Status
Paper Information
Toner Gauge
Remove Memory Media
Check Counter
(4) Remove the USB memory.
(5) Press [
] (Status Monitor/Cancel) to close the screen.