


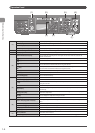


1-12
Before Using the Machine
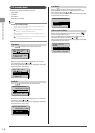
Setting the Current Date and Time
Specify the date and time display formats and set the current
date and time.
The specified date and time are used for some fax functions
and reports.
OK
Keys to be used for this operation
Menu
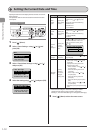
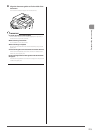
1 Press [ ] (Menu).
2 Select <Timer Settings> using [ ] or [ ] and
press [OK].
Menu
Preferences
Timer Settings
Common Settings
Copy Settings
3 Select <Time & Date Settings> using [ ] or [ ]
and press [OK].
Timer Settings
Time & Date Settings
Sleep Timer
Auto Reset Timer
Screen After Auto R
...
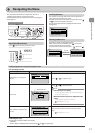
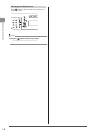
4 Select the setting using [ ] or [ ] and press [OK].
Time & Date Settings
Date Display Type
12/24 Hour Clock
Current Time Settin
...
Time Zone Settings
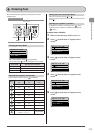
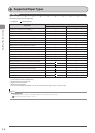
Settings Purpose What to do
<Date
Display
Type>
Specify the
date display
format.
Select one of the following display
formats using [
] or [ ] and press
[OK].
The formats include the following.
• MM/DD/YYYY
• DD/MM YYYY
• YYYY MM/DD
<12/24
Hour
Clock>
Specify the
time display
format.
Select one of the following display
formats using [ ] or [ ] and press
[OK].
The formats include the following.
• 12 Hour (AM/PM)
• 24 Hour
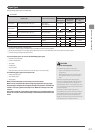
<Current
Time
Settings>*
Specify the
current
time and
date.
Use [
] or [ ] to enter time and date,
or to switch between <AM> and
<PM>. To move the cursor, press
[ ] or [ ].
Current Time Settings
01/01/2011 12:52 AM
<Time Zone
Settings>
Specify the
time zone.
Select the time zone using [
] or [ ]
and press [OK].
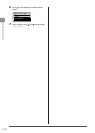
<Daylight
Savings>
Specify
whether
to use the
daylight
saving time.
To use daylight saving time,
1. Select <On> using [ ] or [ ] and
press [OK].
2. Specify the starting date of the
daylight saving time.
- Select <Month> using [ ] or [ ]
and press [OK].
- Select the starting month and
press [OK].
- Select <Day> using [ ] or [ ]
and press [OK].
- Select the starting week and
press [OK].
- Select the starting day and press
[OK].
- Select <Apply> using [ ] or [ ]
and press [OK].
3. Repeat Step 2 to specify the ending
date.
* Make sure to configure <Time Zone Settings> before
configuring this setting (If you change <Time Zone
Settings>, <Current Time Settings> is changed accordingly).
5 Press [ ] (Menu) to close the menu screen.