


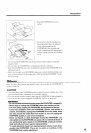

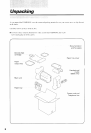


Assembling
the FAXPHONE
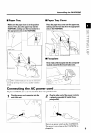
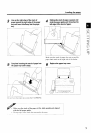
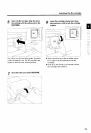
I Paper
Tray
Make sure
the
paper
lever is in the
position
shown.
Then,
place
the
paper
tray into the
FAXPH0NE, making
sure
the two knohs fit in
the appropriate slots in the FAXPH0NE.
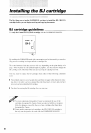
F 1
rnlr
symbol
indicates the use of a function
(envelope
printing)
that is not
available
with this
rnodel.
I Paper Tray Cover
Place the
paper
tlay
cover ovel the
paper
tray,
making sure
the two tabs
fit in the appropriate
slots
in the FAXPH0NE.
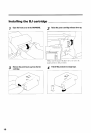
I
Faceplate
Fit ttre 4 tabs of
the faceplate
into the corespond-
ing
slots around
the One-touch
button area.
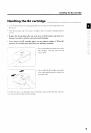
t
Plug the other end of
the
power
cord
into
I
a
properly grounded
AC outlet
(three-
prong
outlet).
!
{;l3
iTT
'*{
cxd;
ffi
frlr
ffi,
.tr
Plug the FAXPHONE into a 120
volt
AC 60
Hz three-wire
grounded
oullet
Gonnecting the
AG
power
cord
7
Plug
the
power
cord connector
into the
I
tear ofthe unit.
There is no
power
switch
on the
FAXPHONE.
The
power
is on as
long as the
FAXPHONE
is
plugged
in.
5