2.15 Black Balance Adjustment
[PC black balance adjustment]
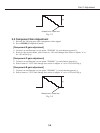
1. Receive the 16-step gray scale computer signal.
2. Set to COMPUTER mode.
3. Enter to the service mode, select item no. “9” (Red) or “10” (Blue), and change data
values respectively to make a proper white balance at darker portion of the screen.
[AV black balance adjustment]
4. Receive the 16-step gray scale video signal.
5. Set to VIDEO mode.
6. Select item no. “9” (Red) or “10” (Blue), and change data values respectively to make
a proper white balance at darker portion of the screen.
[AV black balance adjustment]
7. Receive the 16-step gray scale component video signal.
8. Set to VIDEO (Component) mode.
9. Select item no. “9” (Red) or “10” (Blue), and change data values respectively to make
a proper white balance at darker portion of the screen.
Confirm that the same white balance is obtained at darker portion of the screen in
video, computer and component input.
2.16 Note on White Uniformity Adjustment
If you find the color shading, please adjust the white uniformity by using the proper
computer and “Color Shading Correction” software.
Part 3: Adjustment
3-15
COLOR SHADING CORRECTION (Ver. 2.0.2)
Attached with this manual


