


Part 3: Adjustment
3-16
3. OPTICAL ADJUSTMENTS
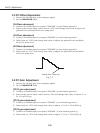
3.1 Contrast Adujstment
[Before adjustment]
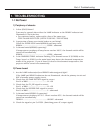
• Adjustment requires a 2.0mm hex wrench and a
slot screwdriver.
• Remove cabinet top following to “Mechanical
Disassemblies”.
• Input a 100% of black raster signal.
[R/G/B-contrast adujstment]
1. Shield the unnecessary lights by inserting the thick paper etc. in front of the LCD
panels .
When adjusting the R-Contrast, project red light only.
When adjusting the G-Contrast, project green light only.
When adjusting the B-Contrast, project blue light only.
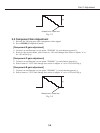
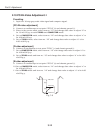
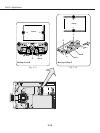
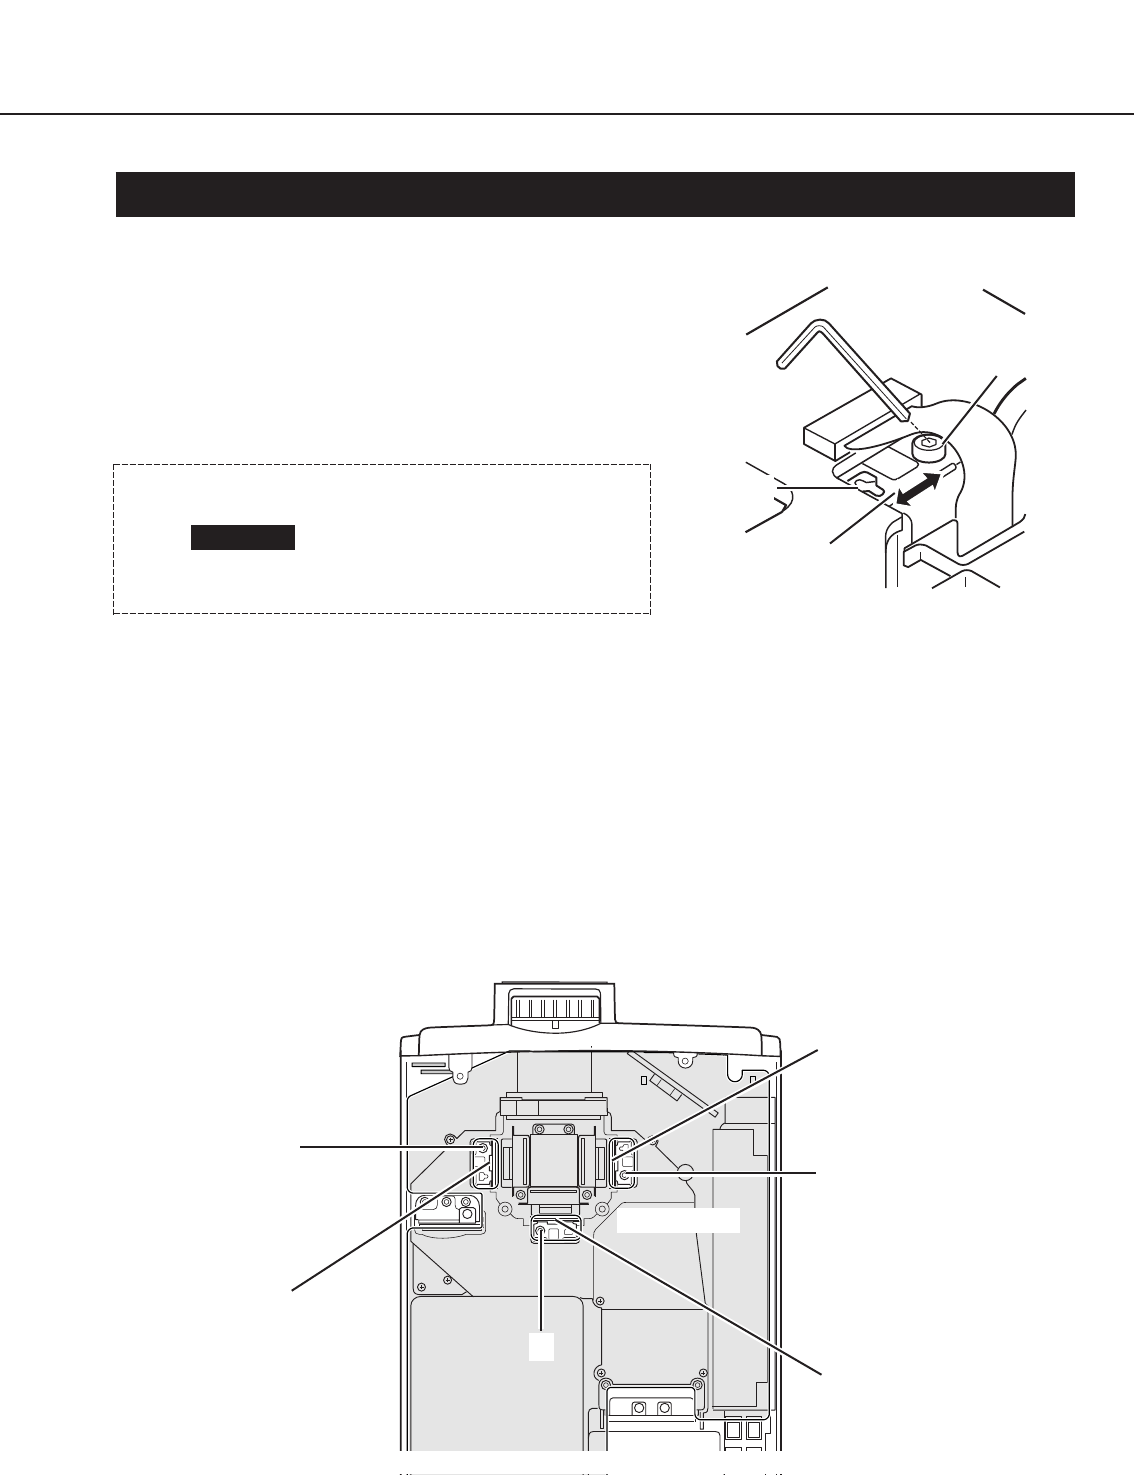
2. Loosen a screw A (Fig.3-11/3-12) on the polarized glass mounting base which you
intend to adjust.
3. Adjust a slots B as shown in Fig.3-11 to obtain the darkest brightness on the screen
by turning a slot screwdriver.
4. Tighten the screw A to fix the polarized glass mounting base.
Repeat steps 1 to 4 for remaining polarized glasses.
Do not disconnect the
connectors on main and
component boards
otherwise the projector can
not be turned on.
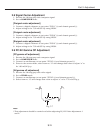
Slot B
Polarized glass
mounting base
A
Fig. 3-11
CAUTION
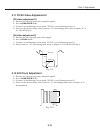
B-Polarized Glass
Mounting Base
R-Polarized Glass
Mounting Base
G-Polarized Glass
Mounting Base
A
A
A
Main Board
Fig. 3-12