


If You Are Using Mac OS X v.10.3.9
You need to set MP Navigator EX as the starting software application in Image Capture under
Applications of Mac OS X.
(1)
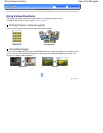
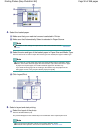
Select Applications on the Go menu, and double-click the Image Capture icon.
(2)
Click Options at lower left of the scanner window, select MP Navigator EX 3 in
Application to launch when scanner button is pressed, then click OK.
To quit Image Capture, select Quit Image Capture on the Image Capture menu.
Note
If Options does not appear, select Preferences on the Image Capture menu, click Scanner, and
click Use TWAIN software whenever possible to clear the option. Then quit Image Capture and
restart it.
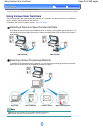
Forwarding Scanned Data to the Computer
1.
Select the scan operation.
(1)
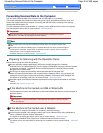
Turn on the power.
See
Operation Panel
.
(2)
Select Scan
on the
HOME
screen, and press the
OK
button.
(3)
Use the
Easy-Scroll Wheel
(the
or button) to select PC
, and press
the
OK
button.
The computer selection screen will appear.
(4)
Select the computer to forward scanned data, and press the
OK
button.
Here we select USB.
The original type selection screen will appear.
Note
For the network connection, select the computer name to forward scanned data in the list.
For the connection via USB only, only USB appears on the LCD.
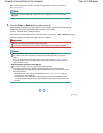
(5)
Select the type of original, and press the
OK
button.
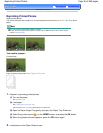
Here we select Auto scan.
Note
If the computer connected over a network is selected in (4), Auto scan does not appear
on the LCD.
The types of original other than Auto scan are Document and Photo. If you select other
than Auto scan, you can save all scanned data in a PDF file, attach it to mail, or open it
with a software application.
For details, refer to the on-screen manual:
Advanced Guide
.
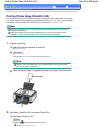
2.
Load an original on the Platen Glass.
Page 43 of 988 pagesForwarding Scanned Data to the Computer