11-2 Maintenance Chapter 11
Replacing an ink tank
This section describes how to replace an ink tank. Before replacing an ink tank, be sure to read
the section When to replace an ink tank ( p. 11-1).
CAUTION
• Do not replace ink tanks while the machine is printing or performing another operation.
Follow this procedure to replace an ink tank:
1 Make sure the power is turned on.
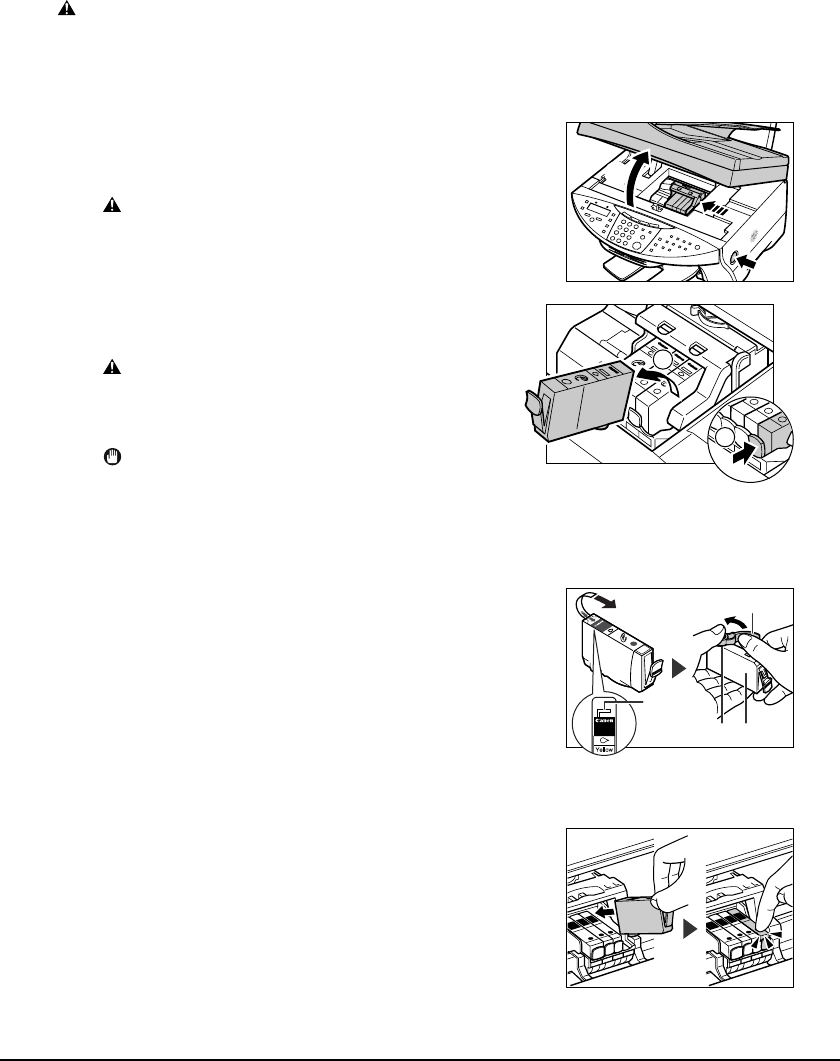
2 Press [Open] q and lift up the scanning unit w.
• The printhead holder automatically moves to the
center of the machine.
CAUTION
• Do not try to manually move or stop the
printhead holder.
• Do not touch any metal parts.
3 Press on the tab to release the empty ink
tank q, then remove it from its slot w.
CAUTION
• Do not remove the printhead from the machine.
• If several ink tanks need replacing, remove
and replace each one individually.
IMPORTANT
• Discard the empty ink tank immediately
according to local laws and regulations for
disposal of consumables.
• Handle ink tanks carefully to avoid staining
clothing or the surrounding area.
4 On the new ink tank, pull the orange tape in
the direction of the arrow and remove the
plastic wrapper so you can see the air hole A.
Turn the ink tank over so that the protective
cap B is facing up. Then hold the ink tank as
shown and remove the protective cap B.
• To avoid spilling ink, never press on the long sides
of the ink tank C.
• Once you remove the cap B, do not touch the ink
port D.
5 Insert the ink tank into the empty slot on
the printhead. Press down gently on the ink
tank until an audible click is heard.
• Make sure the ink tank is the correct color for the
slot.
6 Close the scanning unit until it locks into place.
q
w
w
q
PUSU
Y
e
llo
w
M
a
d
e
in
J
a
p
a
n
I
n
k
T
a
n
k
B
C
I-
3
e
Y
PU
LL
PULL
BCI-3eY
Ink Tank
D C
B
A


