


52
Projection Procedure
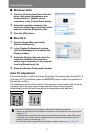
■ Windows Vista
1 Open the [Control Panel] from the start
menu, then select [Appearance and
Personalization] - [Adjust screen
resolution] in the [Control Panel Home].
2 Select the resolution closest to the
maximum output signal resolution of the
projector from the [Resolution] list.
3 Click the [OK] button.
■ Mac OS X
1 Open the Apple Menu and select
[System Preferences].
2 In the [System Preferences] window,
click the [Displays] icon to display the
Display window.
3 Select the [Display] tab and select the
resolution closest to the maximum
output signal resolution of the projector
from the [Resolutions] list.
4 Close the [System Preferences] window.
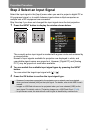
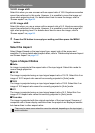
Auto PC Adjustment
If the image display is shifted or there is flickering of the screen when [Analog PC-1]
or [Analog PC-2] is selected, press the AUTO PC button to adjust the projector to
the optimal condition.
The adjustment results will be stored. If the projector is used again with the same
computer, when the input signal is selected the image will be projected
automatically under the same conditions that were previously adjusted.
If the Auto PC adjustment is insufficient, perform the following operations.
• Select the input signal that matches the resolution of the computer from [Input signal
select]. (P70)
• If adjustment is insufficient even when using the above operation, adjust [Total dots],
[Tracking], [Horizontal position], [Vertical position], [Horizontal pixels] and [Vertical
pixels] in [Input signal settings]. (P71)
• For the signal types supported by the projector, see the table on page 172 to 173.
Remote control Projector