


E
28
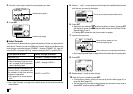
10. After making sure that PRINT is selected on the display, press SET.
• What appears on the display depends on the print pattern you selected
(page 31).
• See “Printing a Label” on page 51 for details about printing.
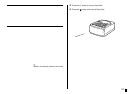
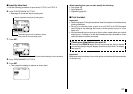
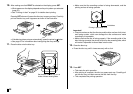
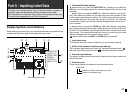
Pressing SET above will cause the disc tray to open part way. Carefully
pull out the disc tray until it appears as shown in the illustration.
• If the disc tray does not open automatically, press the printer’s button.
• See page 55 for information about configuring disc tray settings.
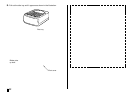
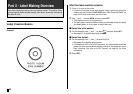
11. Place the disc onto the disc tray.
• Make sure that the recording surface is facing downwards, and the
printing surface is facing upwards.
Important!
• Check to make sure that the disc tray and the disc are free of dirt, dust,
and foreign matter, which can damage the disc surface and make
recording to it impossible.
• Make sure that the disc is facing properly. If the recording side of the
disc is facing upwards, the printer will print on the recording side, which
will make it impossible to record data onto the disc.
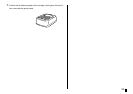
12. Close the disc tray.
• Press the disc tray until it closes securely with a click.
13. Press SET.
• This starts the print operation.
• After printing is complete, the disc tray opens part way. Carefully pull
out the disc tray, and then remove the disc from the tray.
• This completes the printing operation.
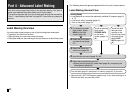
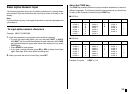
Set the disc onto the tray so it is
inside of these raised guides.
➜
Guidelines
Printing is performed here.