E
26
Creating and Printing a Tape Label with a Logo
Your printer comes with 60 built-in logos that you can incorporate into your
tape labels quickly and easily.
Important!
• You can incorporate built-in logos into tape labels that are printed using
12mm, 18mm or 24mm tape only.
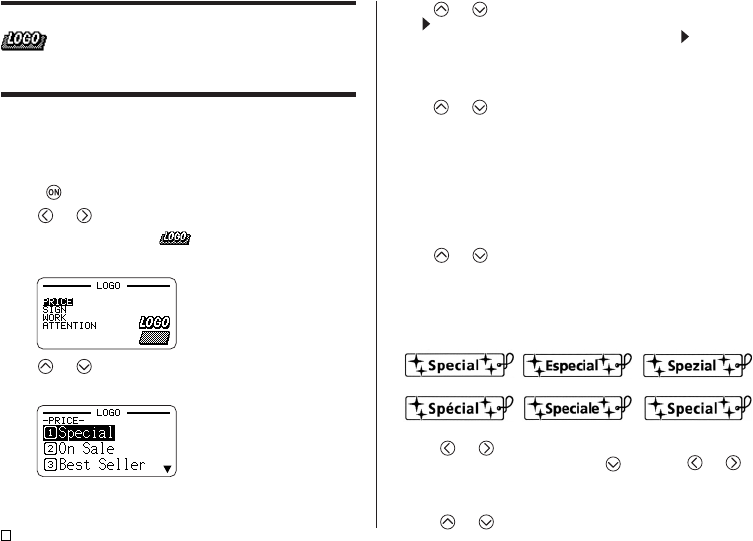
■ To create and print a label with a logo
1. Press to turn on the printer.
2. Use and to select NEW, and then press SET.
3. Use the cursor keys to select , and then press SET.
• This enters the Logo Mode.
• You also could press LOGO in step 2 or 3 to enter the Logo Mode.
4. Use and to select the group you want to use, and then press SET.
Here we will select PRICE.
• For details, see “Built-in Logos” on page 59.
5. Use and to select the logo you want to use.
•
appears on the right side of the display when the logo text runs off the
right side of the display. Selecting a logo that has the
indicator will
cause the logo to scroll automatically in order to display all of the text.
Here we will select Special.
6. Press PREVIEW.
7. Use and to select the logo language you want and then press SET.
• The language you select here does not affect the display language set-
ting.
• The design of the selected logo will scroll on the display.
• To pause scrolling at any point, press SET.
Press SET again to resume scrolling. The display will return automati-
cally to the logo selection screen after logo scrolling is complete.
• To return to the logo selection screen while scrolling is in progress, press
ESC.
8. Press SET.
9. Use and to select the logo language you want and then press SET.
• The language you select here does not affect the display language
setting.
Example
• The following print contents change in accordance with the currently selected
language.
10. Use and to select the print size.
• If you want to print a mirror image, press
and then use and to
select MIRROR.
11. Press SET.
12. Use and to select PRINT, and then press SET.
Spanish German
French Italian Swedish
English


