


27
E
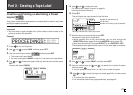
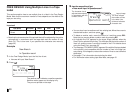
13. Use the number keys (or and ) to specify the number of copies,
and then press
.
• You can specify a value from 1 to 100 for the number of copies.
14. Use and to select the tape cut mode (page 20), and then press
SET.
• This starts the print operation. The screen shown below appears when
printing is complete.
Creating and Printing an Original (Free Design)
Tape Label
This section describes what you can do with the Free Design mode of the
printer, which lets you design your own tape labels. All of the following sec-
tions whose titles start with “FREE DESIGN:” indicate features and functions
that are available in the Free Design mode only.
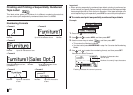
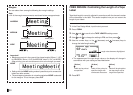
■ To create a basic Free Design
1. Press to turn on the printer.
2. Use and to select NEW, and then press SET.
3. Use the cursor keys to select , and then press SET.
• This enters the Free Design Mode.
• You also could press FREE DESIGN in step 2 or 3 to enter the Free
Design Mode.
4. Use the procedures described in the following “FREE DESIGN” sections
to layout your label and input text.
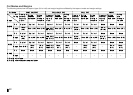
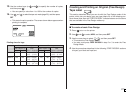
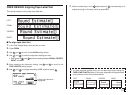
Printing size of a logo
24mm and 18mm tapes
Small
Medium
Large
12mm tape
Vertical
120
120
120
Horizontal
90
120
150
Size
(
Vertical
×
Horizontal
)
12mm × 40.5mm
(
1
/
2
") (1
5
/
8
")
12mm × 54mm
(
1
/
2
") (2
1
/
8
")
12mm × 67.5mm
(
1
/
2
") (2
11
/
16
")
Zoom Factor (%)
Zoom Factor (%)
Vertical
100
100
100
Horizontal
80
100
120
Size
(
Vertical
×
Horizontal
)
10mm × 36mm
(
3
/
8
") (1
7
/
16
")
10mm × 45mm
(
3
/
8
") (1
3
/
4
")
10mm × 54mm
(
3
/
8
") (2
1
/
8
")