


35
E
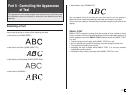
Example
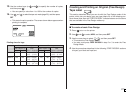
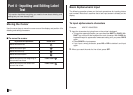
■ To create a barcode tape label
1. Press to turn on the printer.
2. Use and to select NEW, and then press SET.
3. Use the cursor keys to select , and then press SET.
• You also could press BARCODE in step 2 or 3 to enter the Barcode
Mode.
4. Use and to select the type of bar code you want to print, and then
press SET.
5. Input 12 number of digits when you are using EAN-13 (7 digits, when
using EAN-8), and then press SET.
6. Use and to select the barcode size, and then press SET.
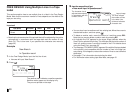
7. Use and to select PRINT, and then press SET.
8. Use the number keys (or and ) to specify the number of copies,
and then press
.
• You can specify a value from 1 to 100 for the number of copies.
9. Use and to select the tape cut mode (page 20), and then press
SET.
• This starts the print operation.
• For information about saving tape label data, see page 45.
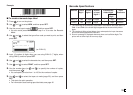
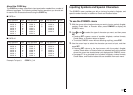
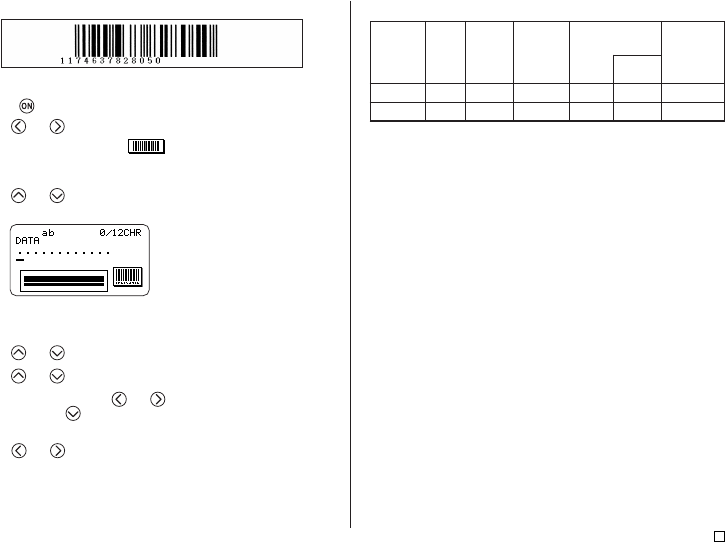
(ex. EAN-13)
Barcode
EAN-13
EAN-8
Barcode Specifications
Check
Digit*1
Ye s
Ye s
Printed
Digits*2
13 digits
8 digits
Number
of Input
Digits*3
12 digits
7 digits
Automatically
Added Digits
– 1 digit
– 1 digit
Input
Characters
Numerals
Numerals
Check
Digit*1
*1 The check digit is automatically calculated in accordance with input data. For
EAN-13 and EAN-8, the check digit is appended at the end of the printed
digits.
*2 The number of digits printed below a bar code equals the input characters
plus automatically appended characters.
*3 An error message is displayed whenever there are insufficient digits. The
printer will not allow input of too many digits.