


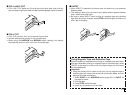


29
E
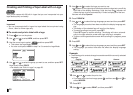
Use and to select the option you want:
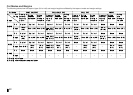
• NARROW: 6mm (
1
/
4
") margins
• MEDIUM: 20mm (
13
/
16
") margins
• WIDE: 38mm (1
9
/
16
") margins
• NONE: 0mm (0") margins
• See page 30 for more information.
• AUTO: Automatically adjusts tape length in
accordance with the number of characters.
• FIX: Maintains a fixed tape length in the range
of 0cm (0") to 99.9cm (39
5
/
16
"). See page 30
for more information.
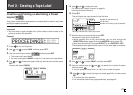
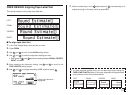
FREE DESIGN: Configuring Label Form Settings
You can use the procedure in this section to configure label form settings.
■ To configure label form settings
1. In the Free Design Mode, input the text you want.
2. Press FORM.
3. Use and to select the setting you want to change, and and
to change the currently selected setting.
• You also can change the DIRECTION setting while creating a label in
the Layout Mode (page 23) or Numbering Mode (page 24).
• You also can change the MIRROR setting while creating a label in the
Layout Mode or Numbering Mode.
• You also can change the MARGINS setting while creating a label in the
Numbering Mode. Note, however, that NONE cannot be selected for the
MARGINS setting at this time.
4. After all the label form settings are the way you want, press SET.
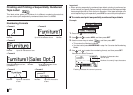
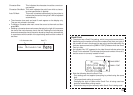
When this setting
is selected:
MARGINS
TAPE LENGTH
When this setting
is selected:
DIRECTION
ALIGN
PITCH
MIRROR
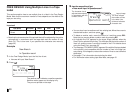
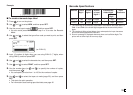
Use and to select the option you want:
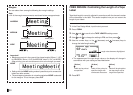
• HORIZONTAL: Positions text from left to right
• VERTICAL: Positions text from top to bottom
• LEFT: Aligns text flush left.
• EQUAL: Equally spaces text to fill the entire
space available.
• CENTER: Centers text.
• RIGHT: Aligns text flush right.
• See page 31 for more information.
• Specify a value from 0.0 mm (0") to 31.9mm
(1
1
/
4
"). Changing this setting also causes the
tape length to change accordingly.
• This setting cannot be changed when EQUAL
is selected for the ALIGN setting, and when
FIX is selected for the TAPE LENGTH setting.
• NORMAL: Prints the tape normally.
• MIRROR: Prints the tape in mirror image onto
special optionally available iron transfer tape.