17
9
Move the highlighting to the Data Projector to which you want to connect and
then click the [OK] button.
z The computer will connect with the Data Projector and then the Wireless Connection 2
window shown below will appear.
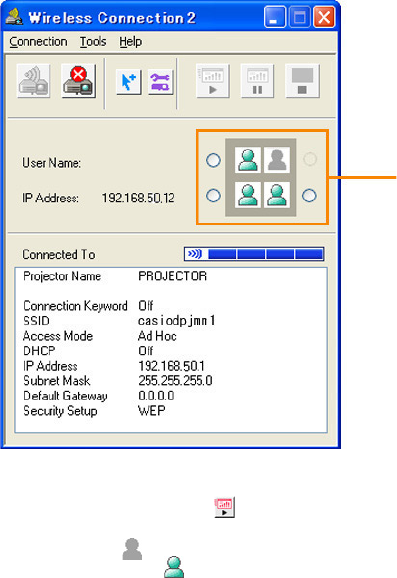
10
On the Wireless Connection 2 window, click one of the projection area position
buttons and then click the button.
z A projection area that is already occupied by another computer will be indicated by a
dimmed icon ( ). Select one of the projection area buttons that is next to an icon
that is not dimmed ( ).
11
Assign a user name, if you want.
z For information about the computer user name, see “Assigning a User Name to a
Computer for Projection” (page 37).
12
Repeat steps 1 through 11 for the third and fourth computers.
z Use the following IP addresses in step 6 for the remaining computers.
Computer 3: 192.168.50.13
Computer 4: 192.168.50.14
Projection area position buttons (Step 10)


