28
To turn connection keyword input on or off on the Data Projector
1
While Wireless is shown in the projection area, press the [MENU] key on the
Data Projector’s remote controller.
z This will display the setup menu.
2
Press the [T] key to move the highlighting to “USB” and then press the
[ENTER] key.
3
Press the [T] key once to move the highlighting to “Setup” and then press the
[ENTER] key.
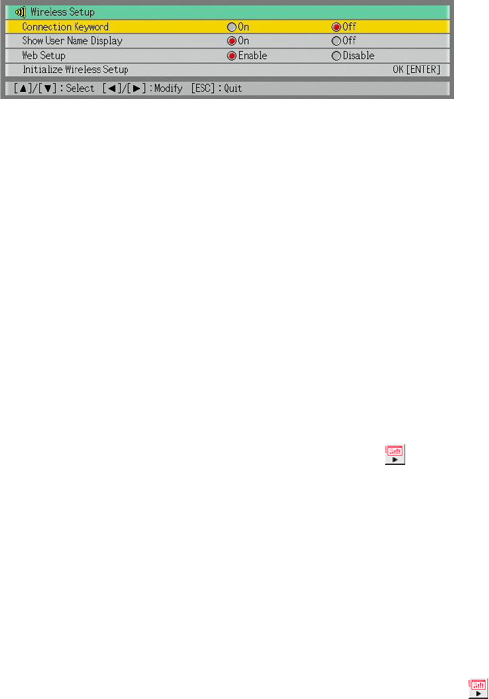
z This will display the Wireless setup menu with “Connection Keyword” highlighted.
4
Use [X] and [W] to select “On” or “Off”.
z Selecting “On” will require connection keyword input whenever a computer tries to
connect to the Data Projector.
5
To exit the Wireless setup menu, press the [ESC] key.
To connect to the Data Projector from a computer over a wireless LAN
when connection keyword input is required
1
On the computer, perform the required operation to connect to the Data
Projector.
z To do this, perform the procedures under “Using a Manual Connection Profile for
Wireless LAN Connection between the Data Projector and One or More Computers”
(page 11).
2
On the Wireless Connection 2 window, click the button.
z This will display a dialog box for inputting a connection keyword.
3
Enter the connection keyword that is preset for the Data Projector and then click
the [OK] button.
z If the input connection keyword is correct, a wireless LAN connection will be established
between the Data Projector and computer and the computer screen contents will be sent
to the Data Projector.
z The connection keyword you input will be cleared if it does not match the one that is
assigned to the Data Projector. Re-enter the correct keyword.
z If you input the wrong keyword three times in a row, the connection keyword input dialog
box will not appear again when you click the [OK] button on the error dialog box. To
display the connection keyword input dialog box again, click the button.


