2-12
Installation and Upgrade Guide for Cisco Unified Videoconferencing 3545 MCU Release 5.1
OL-11899-01
Chapter 2 Installing the Cisco Unified Videoconferencing 3545 MCU
Initial 3545 MCU Configuration
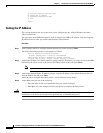
Step 4 At the TFTP Server # 0 prompt, enter the IP address of the first TFTP server you want the MCU to use
and press Enter.
Step 5 At the Would you like to add a new TFTP server [Y/N] prompt, do one of the following:
–
Press Y and enter to identify another TFTP server that you want the MCU to use.
–
Press N and Enter to return to the Network Configuration menu.
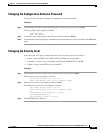
Step 6 At the Network Configuration menu, do one of the following:
–
Enter the letter for the set of parameters that you want to configure.
–
Enter Q to save your changes and allow the device to complete the boot process.
This information appears in the SCCP Protocol Configuration dialog box in the Administrator interface.
In this dialog box, you can configure the MCU to support Cisco Unified CallManager as a SCCP
conference bridge
Changing the Global User Name and Password
You can change the global user name and password that the MCU uses. You use this user name and
password to access the configuration web page for the MCU, and is required for the following tasks:
• Starting a Telnet session to monitor the MCU
• Upgrading the MCU software
• Uploading Interactive Voice Response (IVR) messages to MCU configuration memory
The default global user name is admin. The default password is <null>.
Procedure
Step 1 Start a terminal emulator session as described in the “Setting the IP Address” section on page 2-8.
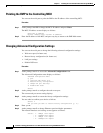
Step 2 At the prompt, enter P.
Step 3 At the Enter User name prompt, enter the name that you want to use as the global user name and press
Enter.
Step 4 At the Password prompt, enter the password that you want to use and press Enter.
The network configuration Main menu appears.
Step 5 At the network configuration Main menu, do one of the following:
–
Enter the letter for the set of parameters that you want to configure.
–
Enter Q to save your changes and allow the device to complete the boot process.


