


Chapter 3: Setting up the Printer 19
11/2012 A799-UG00001 Rev. D A799 Two-Color Thermal Receipt Printer: User Guide
USB cable
Unlike the other connections, the USB cable may be attached and detached while the system is operating.
Using the USB connector with the printer requires that you install the CognitiveTPG USB driver appropriate for your
system. If you are replacing a USB-equipped CognitiveTPG printer, you may not need to reinstall the driver.
To install the USB cable:
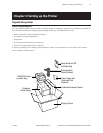
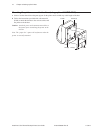
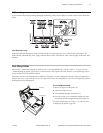
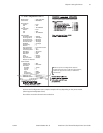
1 Open the connector cover at the rear of the printer.
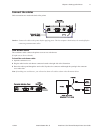
2 Attach the USB cable to the USB connector, shown at the left above (A). Don’t plug the USB cable into the cash
drawer connector (B) by mistake! Doing so may damage the printer. The USB symbol should face up when inserted
into the port. Make sure the connection is snug.
3 Route the cable through the strain relief on the connector cover (see the “Cable routing” section which follows on page
19).
4 Connect the cable to the USB port in the host computer. Again, make sure the USB symbol on the connector is face up
when you plug it into the port.
After you have completed setting up the printer, you can install the USB driver on the host computer.
Download the USB driver to the host computer from the CognitiveTPG corporate website at http://www.cognitivetpg.com.
Downloads can be found in the Downloads section of the site.
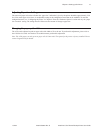
Powered USB cable
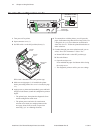
1 Be sure the host computer is turned off.
2 Plug the printer end of the USB cable into the USB connector port on the printer.
3 Route the cable from the printer through the strain relief tab as shown under Cable Routing on page 19.
4 Plug the computer end of the USB cable into the computer.
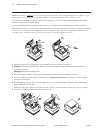
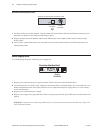
Powered USB communication connector panel
Powered USB
connector
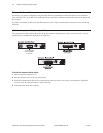
Printer end
of USB cable
Computer end
of USB cable
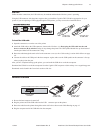
Printer end
of USB cable
Computer end
of USB cable