


Adding Parts 67
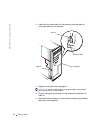
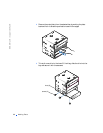
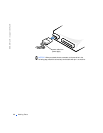
To install a new drive in the upper 3.5-inch bay, first remove the
1/4-inch screw and drive bracket from the drive cage. Attach the new
drive to the bracket with two drive screws on the right side. Then
slide the drive into the drive bay and secure it to the drive cage with
one 1/4-inch screw on each side.
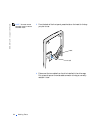
HINT: Be sure to remove
the 1/4-inch screw on the
right side of the drive
cage.
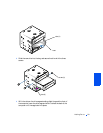
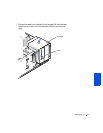
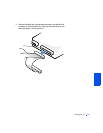
10 With the slots on the drive cage extending slightly beyond the front of
the computer, lower the drive cage and slide it toward the back of the
computer until the cage locks into place.
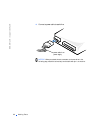
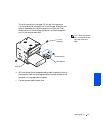
11 Connect a power cable to each drive.
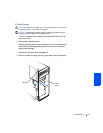
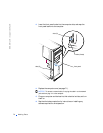
drive screws (2)
1/4-inch
screws (2)
slots (6)
drive bracket