support.dell.com Options and Upgrades 1-5
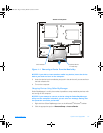
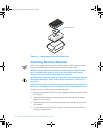
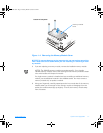
Figure 1-2. Removing the Internal Hard-Disk Drive
4. Slide out the hard-disk drive.
5. Remove the new hard-disk drive from its packaging.
Save the original packaging to use when storing or shipping the hard-disk drive.
C
NOTICE: You may notice some resistance as the drive connects to its inter-
face connector at the back of the hard-disk drive bay. Use firm, even
pressure to slide the drive into place. Do not force the drive into place.
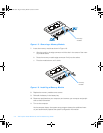
6. Slide the new drive into place.
7. Tighten the screw you loosened in step 3.
8. Test the drive by running the
IDE Devices
tests in the Dell Diagnostics.
For information on running the diagnostics, see “Running the Dell Diagnostics” in
Chapter 2.
9. Install the Dell-provided operating system as well as the drivers and utilities.
See Chapter 3, “Installing System Software,” for instructions.
Returning a Hard-Disk Drive to Dell
To return your hard-disk drive to Dell, you must ship it in its original foam packaging.
Otherwise, the hard-disk drive may be damaged in transit.
hard-disk drive
bottom of computer
screw
3959ubk1.book Page 5 Monday, March 20, 2000 4:52 PM


