Installing System Components 57
Removing the Fan Assembly
CAUTION: See your System Information Guide for complete information about safety precautions,
working inside the computer, and protecting against electrostatic discharge.
1
Open the system. See "Opening the System" in "Troubleshooting Your System."
2
Remove the cooling shroud. See "Removing the Cooling Shroud."
3
Remove the SATA cables from the daughter card. See "Removing a Daughter Card."
4
Remove the blue plastic SATA cable guide by pulling upwards and out of the system.
5
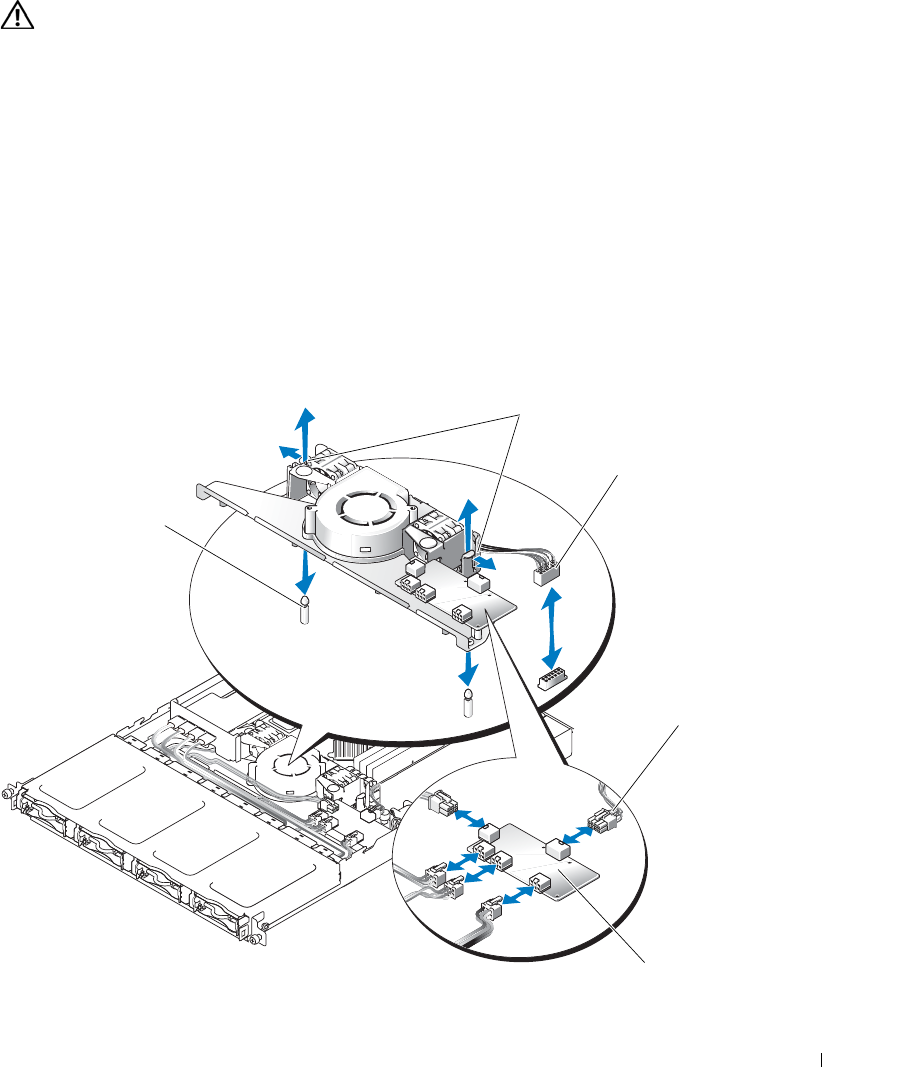
Disconnect the fan assembly’s power cable from the system board. See Figure 6-4.
6
Remove the power distribution board. See "Removing the Power Distribution Board."
7
Disengage the three forward-facing snaps on the fan assembly.
8
While pressing the release levers on each end of the fan assembly, lift the fan assembly off the
two securing posts and out of the chassis. See Figure 6-4.
Figure 6-4. Installing and Removing the Fan Assembly
release levers (2)
securing posts (2)
power cable
power supply
cable
power distribution
board
D3835bk0.book Page 57 Monday, August 24, 2009 4:34 PM
