


Installing System Components 89
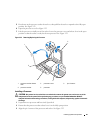
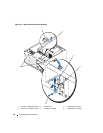
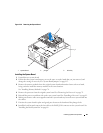
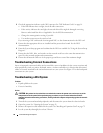
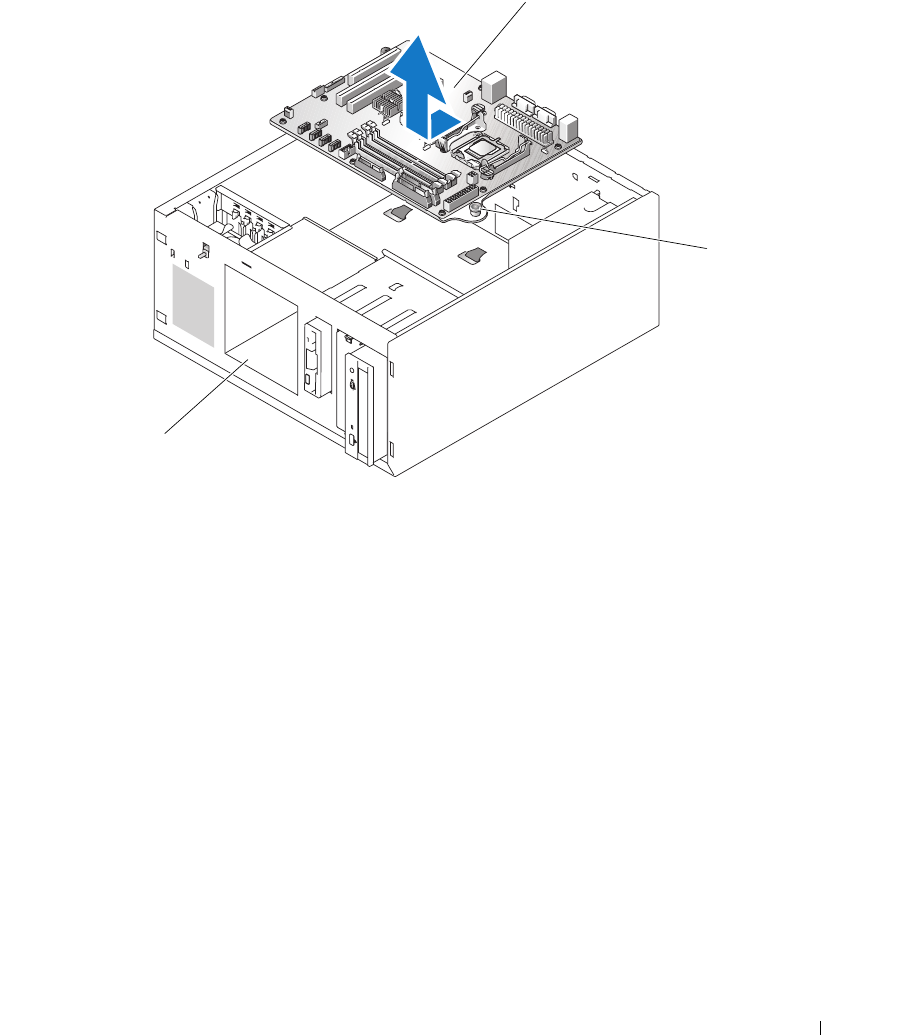
Figure 3-26. Removing the System Board
Installing the System Board
1
Unpack the new system board.
2
Ensure that the system board jumpers are set the same as on the board that you just removed, and
change the settings if necessary. See "System Board Jumpers" on page 115.
3
Remove the memory modules from the original system board and transfer them to the new board,
being careful to install the memory modules in the same locations.
See "Installing Memory Modules" on page 76.
4
Remove the processor from the original system board. See "Removing the Processor" on page 79.
5
Reinstall the processor and heat sink on the new system board. See "Installing a Processor" on page 81.
6
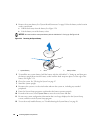
Making sure that no cables are trapped beneath the system board tray, lower the new system board into
the chassis.
7
Position the system board in place and gently press down on the board until the plunger locks.
8
Install the back fan and connect the fan cable to the BACK_FAN connector on the system board. See
"Installing the Back System Fan" on page 68.
1 system board 2 plunger 3 drive bay
2
3
1