


112 Adding and Replacing Parts
1
Follow the instructions in "Before You Begin" on page 109.
2
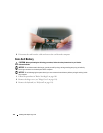
Remove the hinge cover (see "Hinge Cover" on page 111).
NOTICE: The keycaps on the keyboard are fragile, easily dislodged, and time-consuming to replace. Be careful
when removing and handling the keyboard.
3
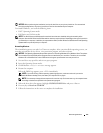
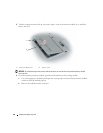
Remove the three screws across the top of the keyboard.
NOTE: Lift the keyboard carefully in
step 4
to ensure that you do not pull on the keyboard cable.
4
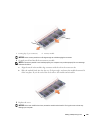
Rotate the keyboard up 90-degrees and lay it on the palm rest to gain access to the keyboard connector.
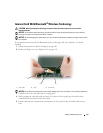
5
If the keyboard cable is held in place by a keyboard lock arm next to the keyboard connector, carefully
pivot the lock arm upward to uncover the cable.
6
Pull up on the pull-tab to disconnect the keyboard cable connector from the keyboard connector on the
system board.
NOTE: When you replace the keyboard, ensure that the keyboard tabs are completely in place to avoid scratching
the palm rest.
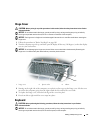
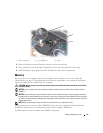
1 screws (3) 2 keyboard tabs (5) 3 palm rest
4 pull-tab 5 keyboard-cable locking arm 6 keyboard cable connector
2
1
3
4
5
6