


174 Adding and Replacing Parts
2
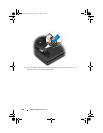
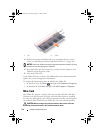
Align the card with the connector at a 45-degree angle, and press the card
into the connector until it clicks.
NOTE: For more specific information about which cable to connect to which
connector, see the documentation that came with your Mini-Card.
3
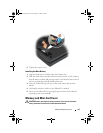
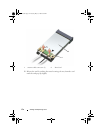
Connect the cables to the Mini-Card, ensuring that you route the cables
correctly.
4
Replace the memory and Mini-Card cover, and tighten the two captive
screws. See "Installing the Memory and Mini-Card Cover" on page 168.
Hinge Cover
CAUTION: Before you begin any of the procedures in this section, follow the
safety instructions in the
Product Information Guide
.
NOTICE: To avoid electrostatic discharge, ground yourself by using a wrist
grounding strap or by periodically touching an unpainted metal surface (such as a
connector on the back of the Tablet-PC).
NOTICE: The hinge cover is fragile and can be damaged if extreme force is used.
Be careful when removing the hinge cover.
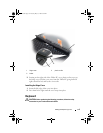
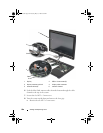
Removing the Hinge Cover
1
Follow the procedures in "Before You Begin" on page 155.
2
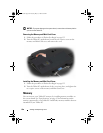
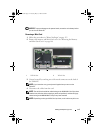
Turn the Tablet-PC top-side up, and then open the display all the way (180
degrees) so that the display rests on your work surface.
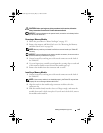
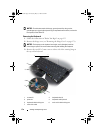
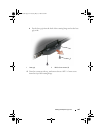
NOTICE: To avoid damaging the hinge cover, do not lift the cover on both sides
simultaneously. Removing the hinge cover in a different way than described may
cause the plastic to break.
book.book Page 174 Tuesday, May 13, 2008 5:03 PM