


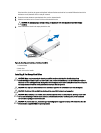
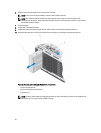


6. Slide the drive out of the system until it is free of the drive bay.
NOTE: If the drive is being permanently removed, install a blank in the slot.
NOTE: Filler brackets must be installed over empty optical drive or tape drive slots to maintain FCC
certification of the system. The brackets also keep dust and dirt out of the system and aid in proper cooling
and airflow inside the system.
7. Close the system.
8. If applicable, install the front bezel.
9. If applicable, place the system upright on a flat, stable surface and rotate the system feet outward.
10. Reconnect the system to its electrical outlet and turn the system on, including any attached peripherals.
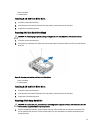
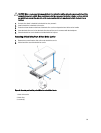
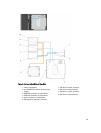
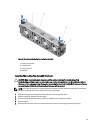
Figure 25. Removing and Installing the Optical Drive or Tape Drive
1. optical drive/tape drive
2. optical drive/tape drive/drive blank
3. release latch
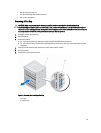
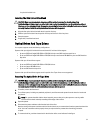
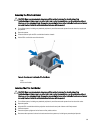
NOTE: The figure below shows the cabling diagram for an optical drive/tape drive with an x16 backplane. All
backplanes (x8, x12, and x16) have an ODD connector.
62