


54
Chapter 9 Product Installation and Hot-Swap Actions
Note: For DC powered products, the power source should be disconnected from any module while it is
being removed or installed. When hot-swap functionality is required, ensure that one module
remains installed, connected, and powered at all times.
Install or replace a DC Power Supply Module as follows:
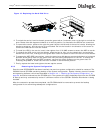
1. Remove the terminal block with wires attached from the faulty DC Power Supply Module as described in
Section 9.2.3, “DC Power Supply Module, Transferring Connections” on page 53.
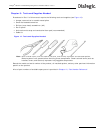
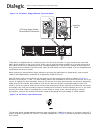
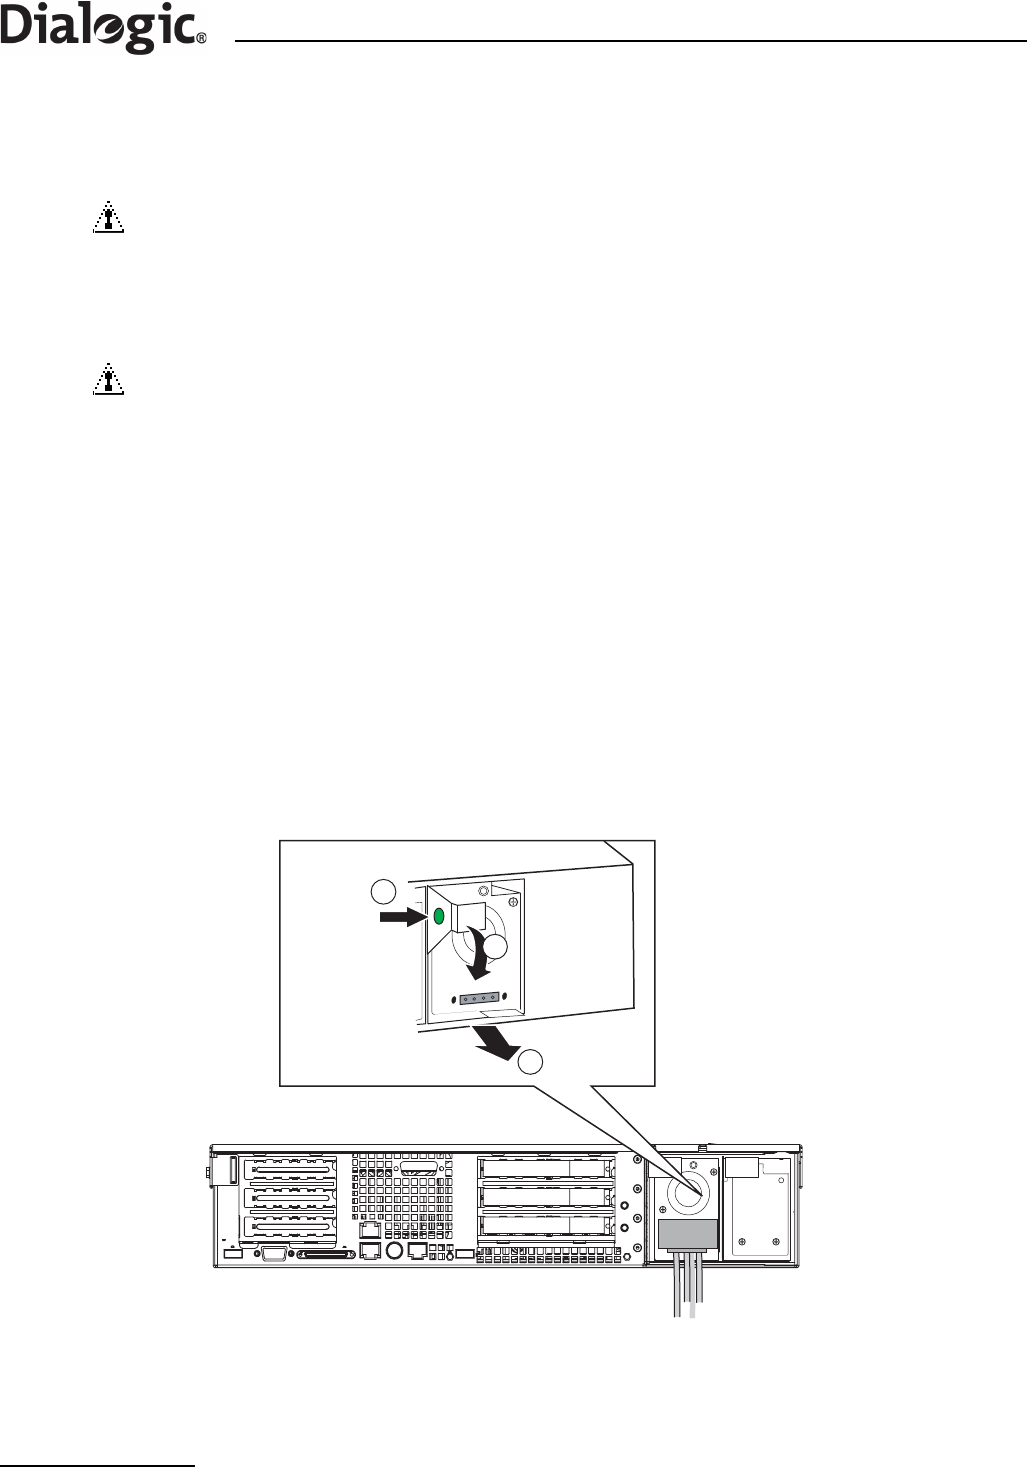
2. Press the green button on the DC Power Supply Module (labeled A in Figure 16).
3. Rotate the green handle downward (labeled B in Figure 16).
4. Using the green handle, pull the Power Supply Module or filler module outward (labeled C in Figure 16).
5. When installing/reinserting a DC Power Supply Module, make sure the green handle is in the downward
position before sliding the module into the Power Supply Cage. Press the module firmly into place, then
rotate the handle upward to complete the insertion.
6. Assemble the terminal block (with wires attached) to the replacement DC Power Supply Module as
described in Section 9.2.3, “DC Power Supply Module, Transferring Connections” on page 53.
Figure 16. Unlocking and Removing the DC Power Supply Module
9.2.6 Replacing an AC Power Supply Module
Observe the following cautions:
CAUTION 1
Both module positions should have either a Power Supply Module or a filler module
installed whenever the product is operational. Otherwise the cooling efficiency of the
remaining module is impaired. During a Hot-swap operation there is a brief interval
when one position is empty. If the replacement Power Supply Module is not
immediately available, then a filler module must be installed.
CAUTION 2
AC Power Supply Modules cannot be used in the DC-input Power Supply Cage, and
similarly, DC Power Supply Modules cannot be used in the AC-input Power Supply
Cage. The correct product variant/Power Supply Module must be specified at time of
ordering, see Chapter 12, “Part Number Reference”.
A
C
B
Note: Power supply module shown
with terminal block removed