


COPYRIGHT © 2006 MERIT INDUSTRIES, INC.
Installing the Router
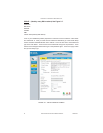
Description
After the broadband installer has completed the installation and testing process, you will be
ready to connect the router.
If you choose to leave the router in the jukebox, simply route an Ethernet cable from the modem
or other broadband source into the rear of the jukebox and connect it to the WAN port on the
router.
If you decide to relocate the router outside the jukebox, follow the steps below:
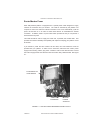
1. Select a Location
Please see the ‘Where to Install the
Designated Line and Router’ in section
2 for suggested locations.
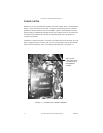
2. Mount or Place the Router
The best place to install the router is on
a shelf or a ledge. If this is not pos-
sible, the box can be mounted to a wall.
The underside of the box has two holes
about 4-1/2" apart on a diagonal. Be
sure that you can view the front of the
box (non-plug side) where the signal
lights are located.
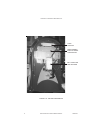
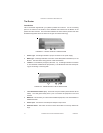
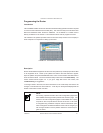
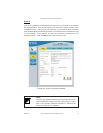
3. Connections
Connect a straight through CAT5 cable
from the router port labeled WAN (see
Figure 2-3) to the output jack of the
broadband equipment. If the provided
cable is not long enough, you can pur-
chase a longer one or make your own.
4. Power on the Router
Connect the AC power adapter’s out-
put plug to the back of the router la-
beled 5V-2A. Connect the other end to
the Power Outlet in the jukebox (see
“Router/Modem Power” in section 2).
Use an extension cord if necessary.
Different green lights may flash on the
router, but should settle to 2 green lights
labeled Power and WAN.
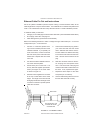
5. Connect Router to Jukebox
Connect a straight through CAT 5 cable
from the router port labeled 1 to the
Ethernet jack on the core computer in-
side the jukebox. See previous page
for more information about construct-
ing and installing this cable.
21 MOD BOX INSTALLATION & OWNER’S MANUAL PM0599-03