


Epson Stylus CX7000F Series
10/06 11
12. Press the keys on the numeric keypad to enter the time in a
12-hour format. You can enter the numbers 0 to 9.
13. Press the x
Start Color/OK
button. You see this display:
14. Press the
1 key on the numeric keypad to select AM or the 2
key to select
PM.
15. Press the x
Start Color/OK button. You return to the
2.Date/Time display.
16. If you want to print your fax
number in the fax header, press
the u or d button, or press the
3 key on the numeric keypad,
to display this option:
17. Press the x
Start Color/OK button. The display goes blank
except for the cursor (_).
18. Press the keys on the numeric keypad to enter your fax
number. You can enter the numbers 0 to 9, and the
characters * and #, up to 20 digits total.
19. Press the x
Start Color/OK button.
20. Press the y
Cancel/Back button until you return to the
screen displaying the date.
Selecting the Paper Size
Before you receive a fax, be sure to load plain paper and set the
Paper Size setting to the size of paper you’ve loaded. Also
make sure the
Automatic Reduction setting is set to receive
faxes in the desired size (see the next section for details).
Selecting Send/Receive Settings
Your CX7000F Series is set up to send and receive faxes using
the default settings below. For more information about these
and other fax settings, see the User’s Guide.
To change the fax settings listed above, follow these steps:
1. Press the
Fax button once to
enter Fax mode. The
Fax
button lights up and you see
this display:
2. Press the
Setup button. You
see this display:
3. If you need to change the
Paper Size, Automatic
Reduction, or Last
Transmission Report
settings, press the u or d
button, or press the
4 key on
the numeric keypad, to display
this option:
4. Press the x
Start Color/OK
button. You see this display:
5. Press the u or d button, or press the
3, 4, or 5 key on the
numeric keypad, to display one of these options:
❏ 3.Paper Size
❏ 4.Automatic Reduction
❏ 5.Last Transmission Report
Then press the x Start Color/OK button.
6. Press the u or d button until the setting option you want is
displayed, then press the x
Start Color/OK button to
select it.
7. Repeat steps 5 and 6 to change any other settings. When
you’re finished, press the y
Cancel/Back button to return
to the
4.Scan & Print Setup menu.
Setting and Options Description
Paper Size
Letter (8.5 × 11; default)
Legal (8.5 × 14)
A4 (8.3 × 11.7)
Indicates the size of the paper loaded in
the CX7000F Series for printing received
faxes.
Automatic Reduction
On (default)
Off
Indicates whether large received faxes
are reduced in size to fit on the selected
Paper Size or printed at their original size
on multiple sheets.
Last Transmission Report
Off
On Error (default)
On Send
Indicates whether or when the CX7000F
Series prints a report for outgoing faxes.
Select Off to turn off report printing, On
Error to print reports only when an error
occurs, or On Send to print reports for
every fax you send.
Dial Mode
Tone (default)
Pulse
Indicates the type of phone system to
which you’ve connected the CX7000F
Series.
1:AM 2:PM
3.Your Phone Num
DRD
All (default)
Single
Double
Triple
Double & Triple
Indicates the type of answer ring pattern
you want to use to receive faxes. You
must have set up your phone system to
use different ring patterns to select an
option other than All.
ECM
On (default)
Off
Indicates whether you use Error
Correction Mode to automatically
request retransmission of fax data that is
received with detected errors.
V.34
On (default)
Off
Indicates the speed at which you
transmit faxes.
On is 33.6 Kbps and Off 14.4 Kbps.
Rings to Answer
5 (default)
1, 2, 3, 4, 5, 6, 7, 8, or 9
Indicates the number of rings that must
occur before the CX7000F Series
automatically receives a fax.
Setting and Options Description
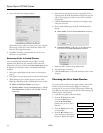
Enter Fax Number
1.Select Speed D
4.Scan & Print S
1.Resolution