


Epson Stylus CX7000F Series
6 10/06
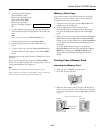
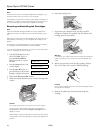
2. Close the document cover gently so that your original does
not move.
Caution:
Do not place heavy objects on the document table glass, and do
not press the glass with too much force. Do not open the
document cover beyond where it stops.
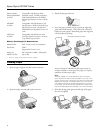
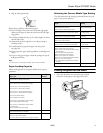
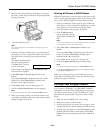
Placing Large or Thick Documents
When you scan a large or thick document, you can remove the
document cover. Just open it and pull it straight up.
If you need to press the document flat while you copy or
scan it, do not press too hard and be careful not to move it.
Caution:
Do not use excessive force on the document cover, and do not
twist it diagonally. You may damage the document cover.
When you are done, replace the document cover by inserting
the tabs back into the slots.
Copying
You can make copies using letter-size (8.5×11-inch),
4× 6-inch, and 5 ×7-inch plain or photo paper.
Copying a Document
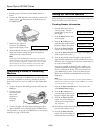
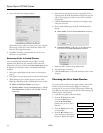
1. Press the P On button to turn
on the CX7000F Series. You
see a screen like this:
2. Place the document on the glass as described on page 5. Be
sure to close the document cover.
3. Load up to 100 sheets of letter-size plain paper. See page 4
for details.
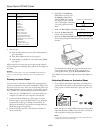
4. Press the
Copy button. You see
this display:
5. If you want your copies
automatically reduced or
enlarged to fit the loaded paper
size (
Fit to Page mode), press
the
Copy button again. The
display changes to this:
6. To make multiple copies (up to 99), press the number keys
on the numeric keypad. The display shows the number you
select.
Note:
To exit Copy mode, press the
y Cancel/Back button.
7. Press the paper type button to select Plain Paper. The light
indicates which type is selected.
8. Press the paper size button to select
Letter.
9. To make a color copy, press the x
Start Color/OK button.
To make a black and white copy, press the x
Start B&W
button.
Printing appears on the display and the CX7000F Series starts
copying.
If you need to stop copying, press the y
Cancel/Back button.
Do not pull out paper that is being printed; it will be ejected
automatically to the output tray.
Note:
The copies may not be exactly the same size as the original.
Copying a Photo
1. Press the P On button to turn
on the CX7000F Series. You
see a screen like this:
2. Place the photo on the glass as described on page 5. Be sure
to close the document cover.
3. Load up to 20 sheets of letter-size, 4 × 6-inch, or 5 × 7-inch
photo paper (see page 4 for details).
4. Press the
Copy button. You see
this display:
12:00 PM Y
Copies:1 100%
Copies:1 FitPage
12:00 PM Y
Copies:1 100%