


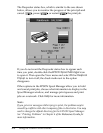
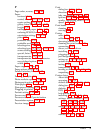


Calibrating the Printer
Your printer has been calibrated at the factory so that vertical
lines in your text and graphics are properly aligned. If you
notice misaligned images in printouts, however, you can
calibrate the printer with the EPSON Printer Calibration
Utility. You may need to do this after moving the printer to a
new location, for example.
Note:
If you cannot use the calibration utility program, you can use the
printer-adjustment mode to calibrate your printer. For details, see
“Calibrating the Printer When Printing From DOS” in Chapter 3 of
your Reference Guide.
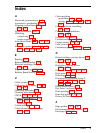
Follow these steps:
1. Double-click the EPSON Printer Calibration icon in the
EPSON group.
2. Click OK at the next screen to start the calibration program.
3. Make sure EPSON Stylus 1500 is selected as the printer.
Select which print head (black or color) to calibrate. Then
click Next.
4. Select the port the Stylus 1500 is connected to. Then click
Next.
5. Make sure the printer is on and is loaded with several
sheets of letter-size paper; then click Next. Wait while the
printer prints the Current Alignment Sheet.
6. Select the patterns that are misaligned; then click Next.
Note:
Only patterns 2, 3, and 4 are selectable. Do not select pattern 1.
Using the Printer Driver Utilities
3-3